3DFarm
This guide will walk you through the steps needed to start remotely controlling your 3D Printers from anywhere.
Who is 3DFarm for?
3DFarm has customers ranging from hobbiests to high revenue online stores to universites and schools. It is for individuals and organisations who want to speed up manufacturing by:
- Printing models without manually writing G-Code to an SD card.
- Clearing the bed automatically after the print bed has cooled down.
- Scheduling the next print after the print bed has cleared.
- Removing the need to be in the same physical location as their 3D Printers.
- Allowing multiple people access to a group of 3D Printers.
And more.
How does it work?
You install software on one or more computers that connect your 3D Printers to the cloud and allow you to access them securely from anywhere. The next section of this guide will explain how to get started.
Getting Started
The recommended way to get up and running with 3DFarm is to use a small and inexpensive Raspberry Pi computer as a dedicated machine to which your 3D Printer(s) will remain connnected. 3DFarm can also be installed on other platforms. See Installing on other platforms for more details.
If you're already familar with setting up and connecting to a Raspberry Pi via SSH or using a keyboard and monitor you can continue to Installating 3DFarm. If not, this section will walk you through the easiest way to setup 3DFarm using a Raspberry Pi Model 4B or Raspberry Pi 5.
Requirements
For this you will need:
- Raspberry Pi Model 4B or Raspberry Pi 5 with at least 2GB of RAM.
- USB-C Power Supply to power the Raspberry Pi.
- A micro SD card. We recommend something like SanDisk Extreme 32 GB. Slower cards can cause issues with the Raspberry Pi.
- A USB micro SD card reader.
- A USB cable to connect your printer to the Pi. The type depends on the model of printer you have.
Optional:
- The Raspberry Pi can connect to the internet using WiFi, however for business users and bigger print farms we recommend using an ethernet cable for a more reliable connection.
Setting up the Raspberry Pi
First of all you need to install Raspberry Pi OS onto the SD card. Insert the micro SD card into the reader and plug this into your computer.
Next, download and install Raspberry Pi Imager.
Afterwards, open the imager and you should see the following:
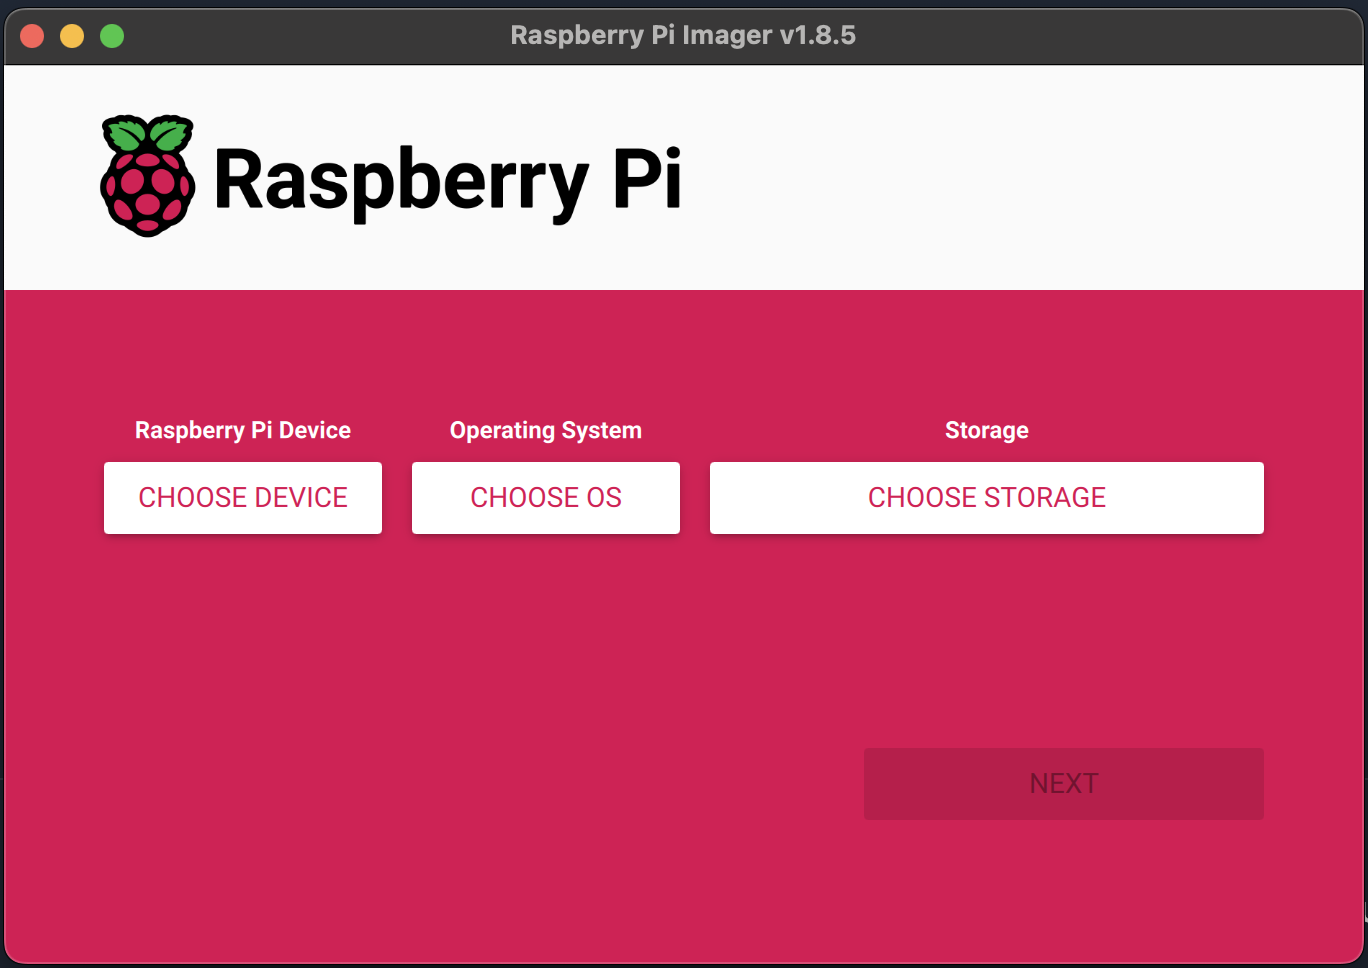
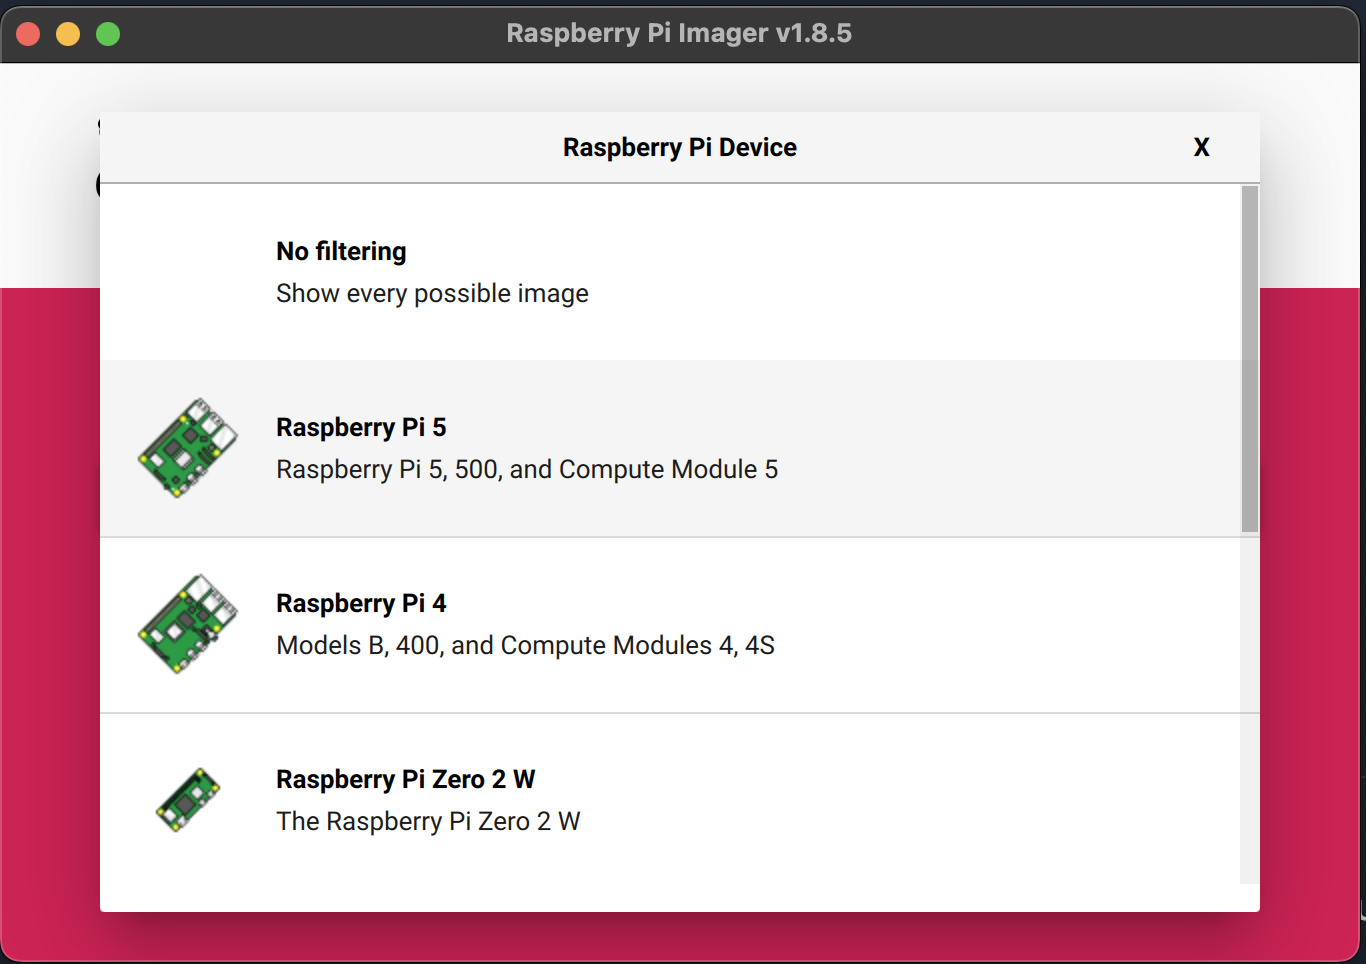
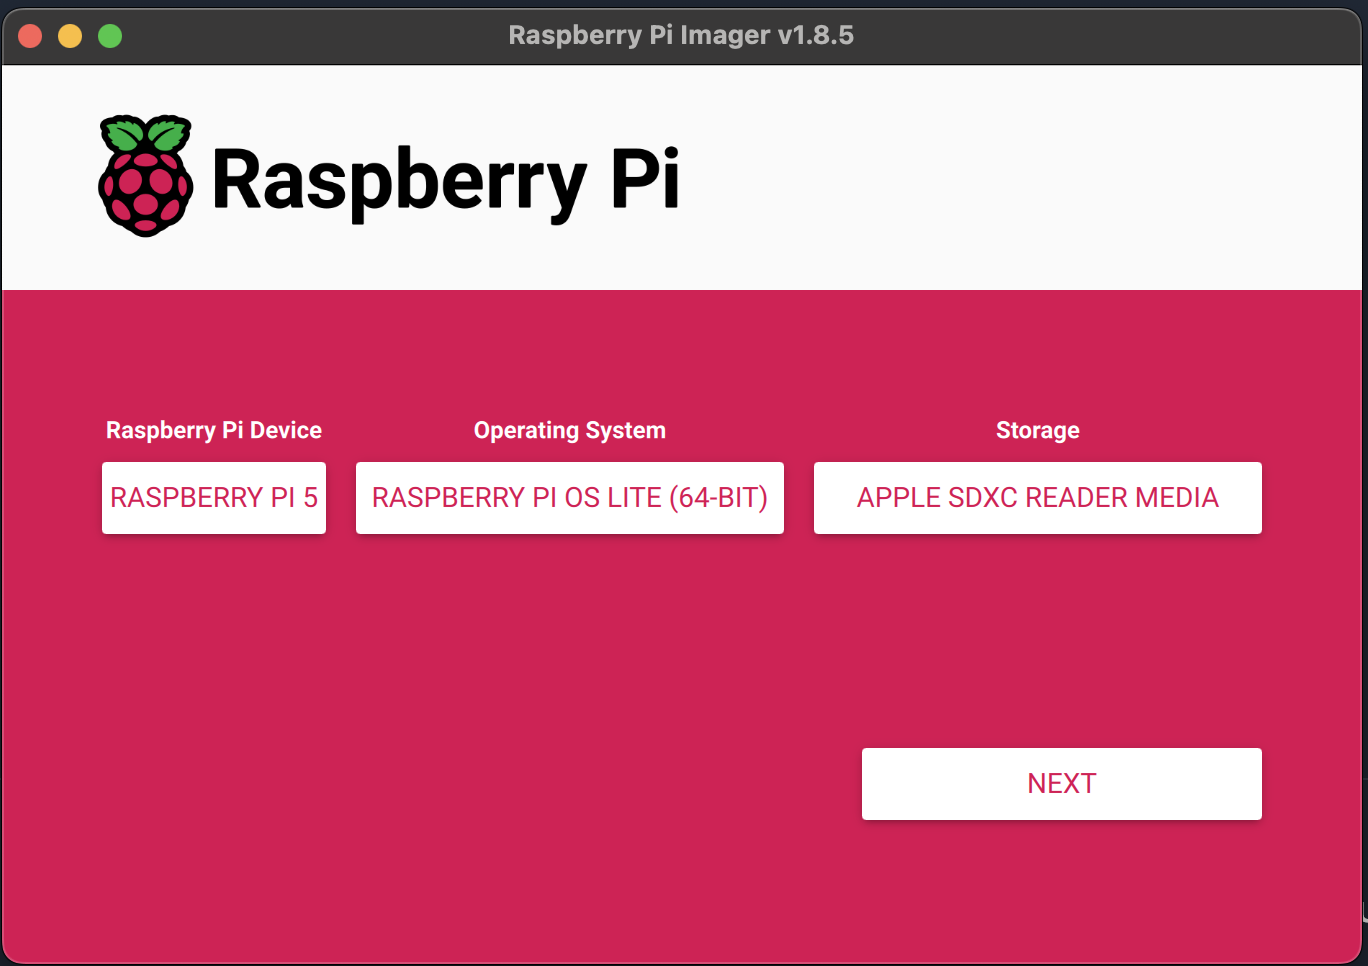
From Choose Device, select the Raspberry Pi you have. In this example I'm using a Raspberry Pi 5.
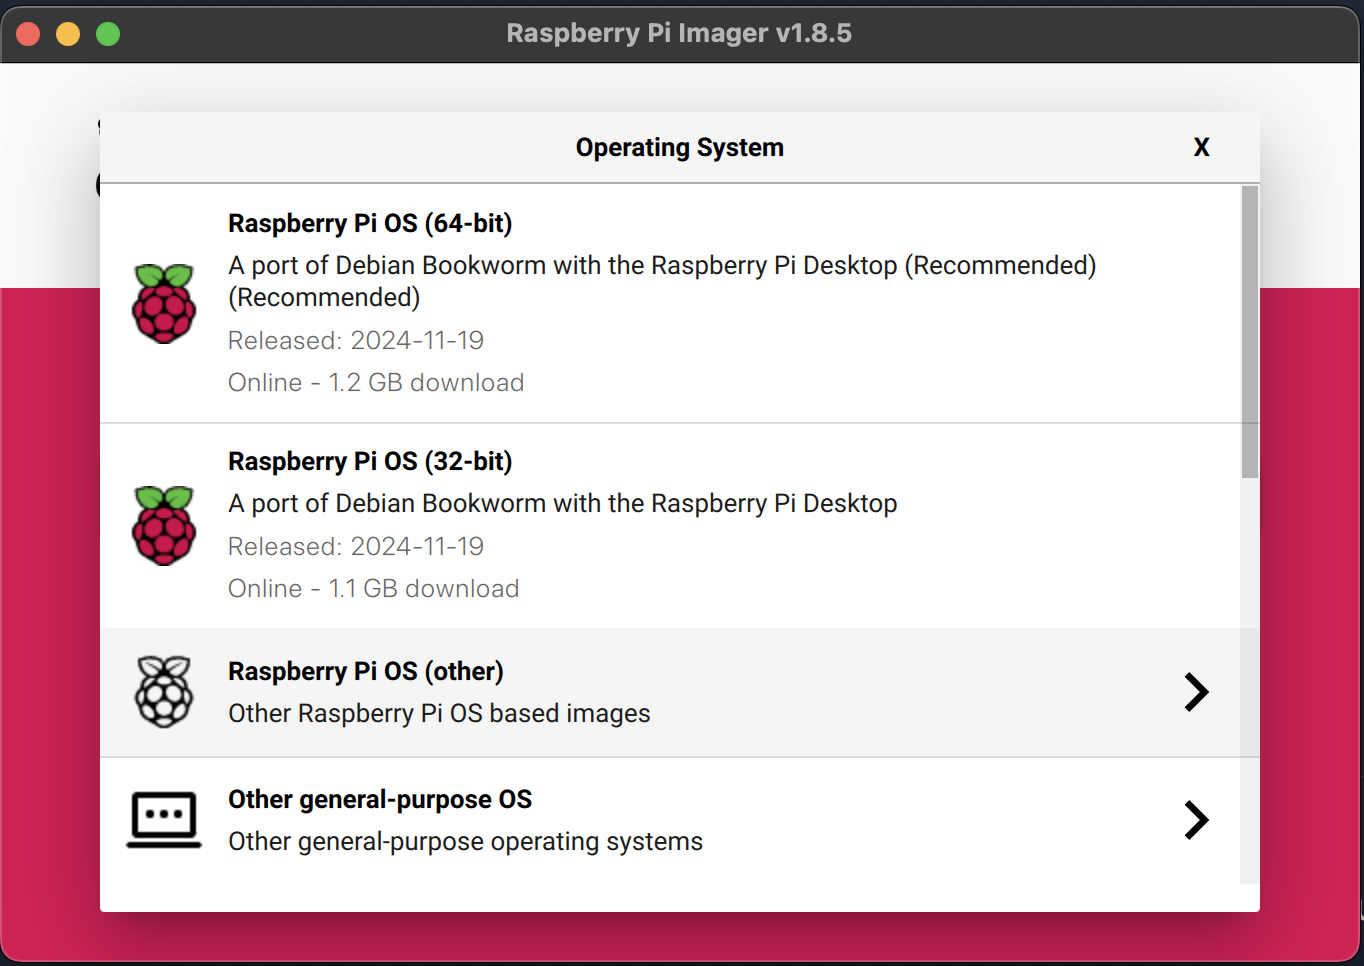
After this from the main screen, click on Choose OS and click Raspberry Pi OS (other) followed by Raspberry Pi OS Lite (64-bit):
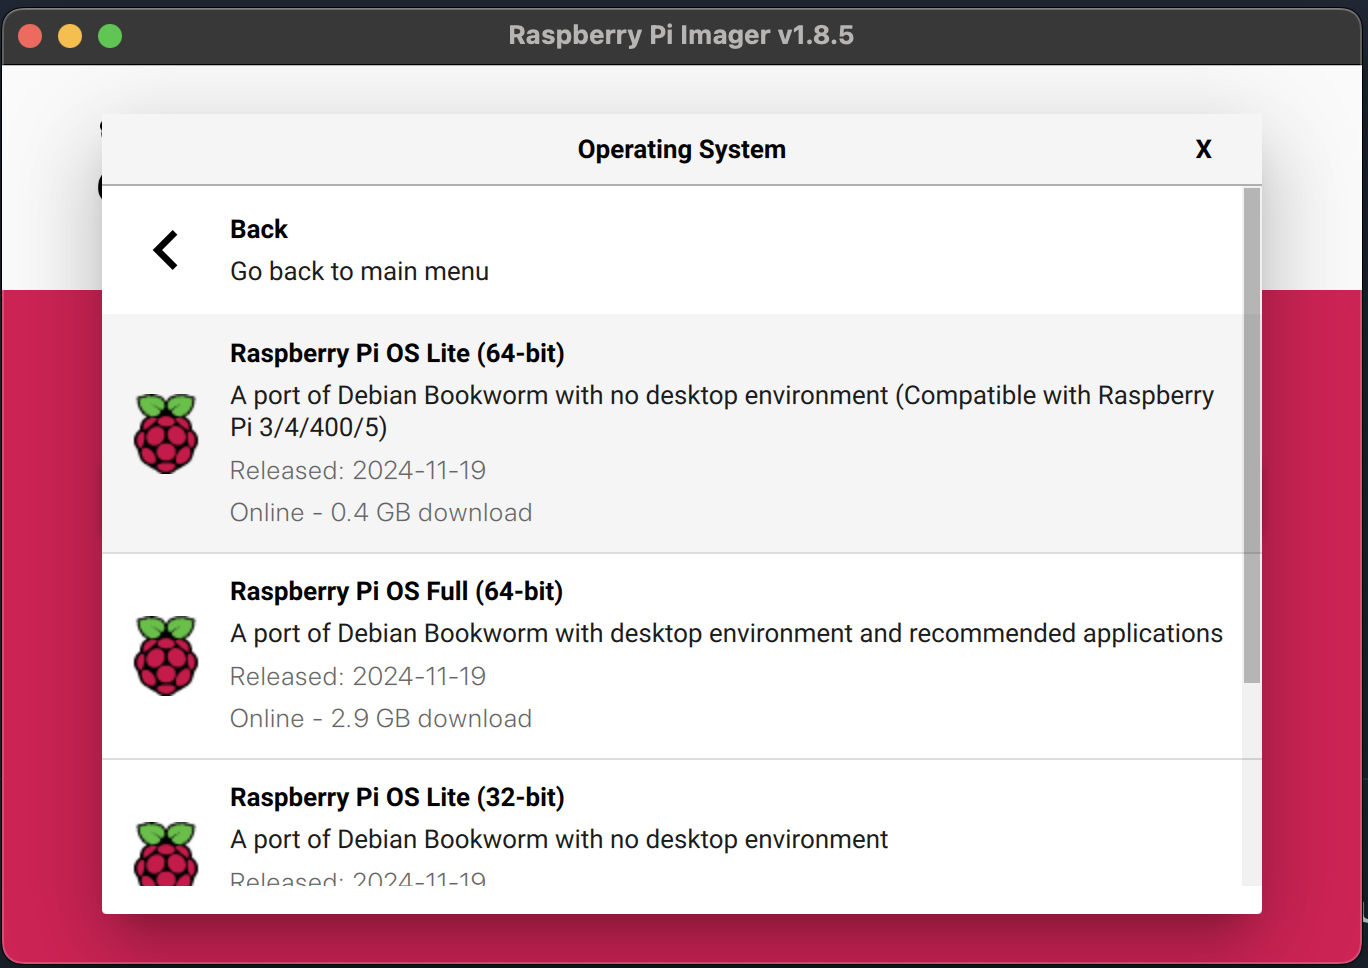
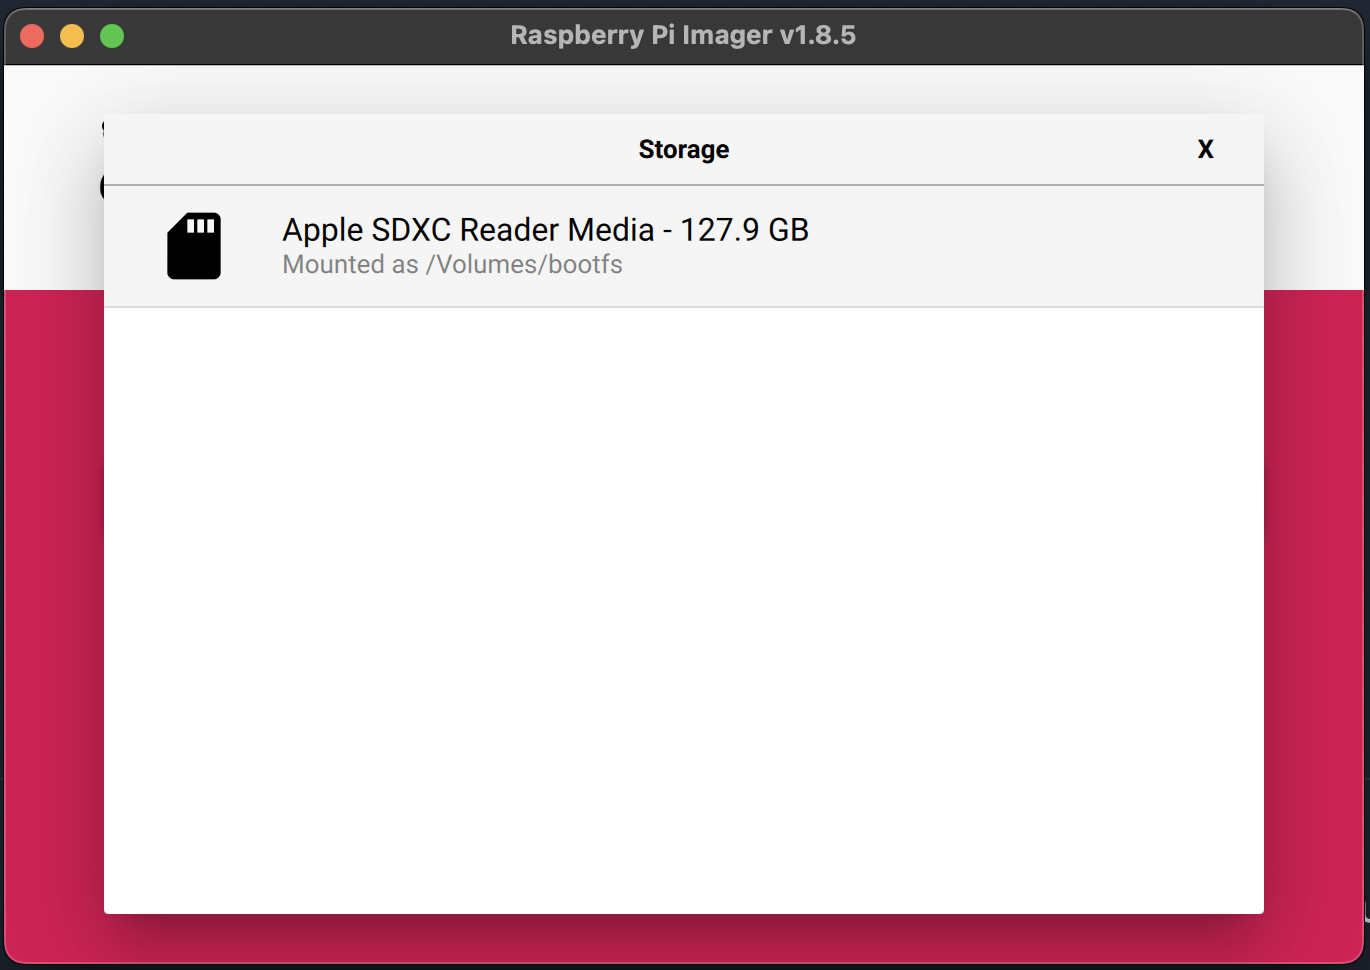
Next, from the main screen click on Choose Storage and select the SD card you inserted earlier. Important: make sure that you select the correct device. Choose the wrong device (including other plugged in removable media) could result in those being overwritten with Raspberry Pi OS. Not ideal.
In the example below I'm using a 128GB microSD card plugged into a MacBook.
Then from the main screen click Next:
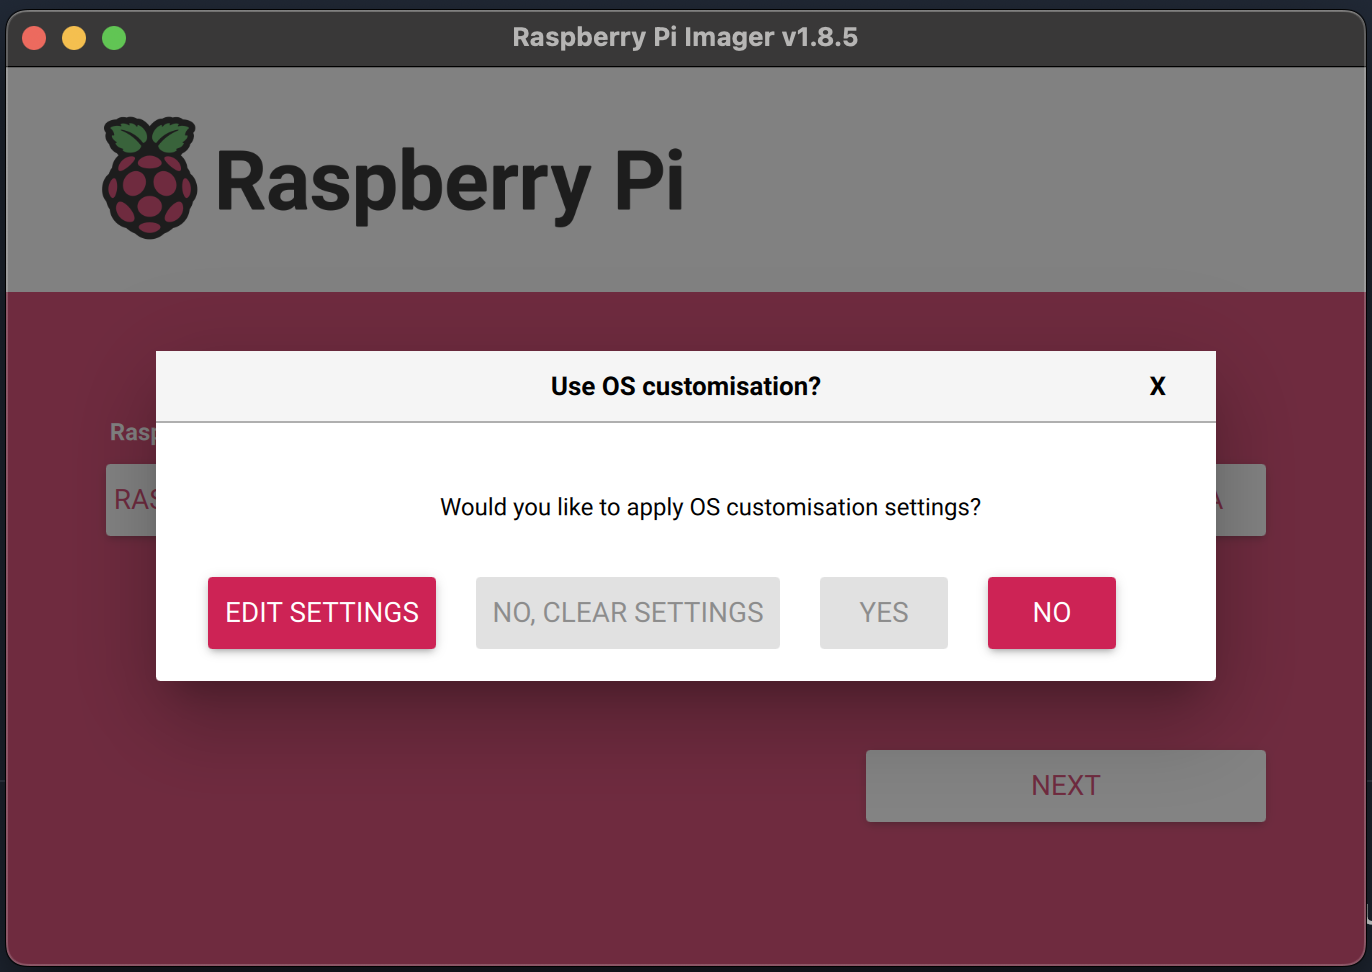
When presented with the next screen. Click Edit Settings:
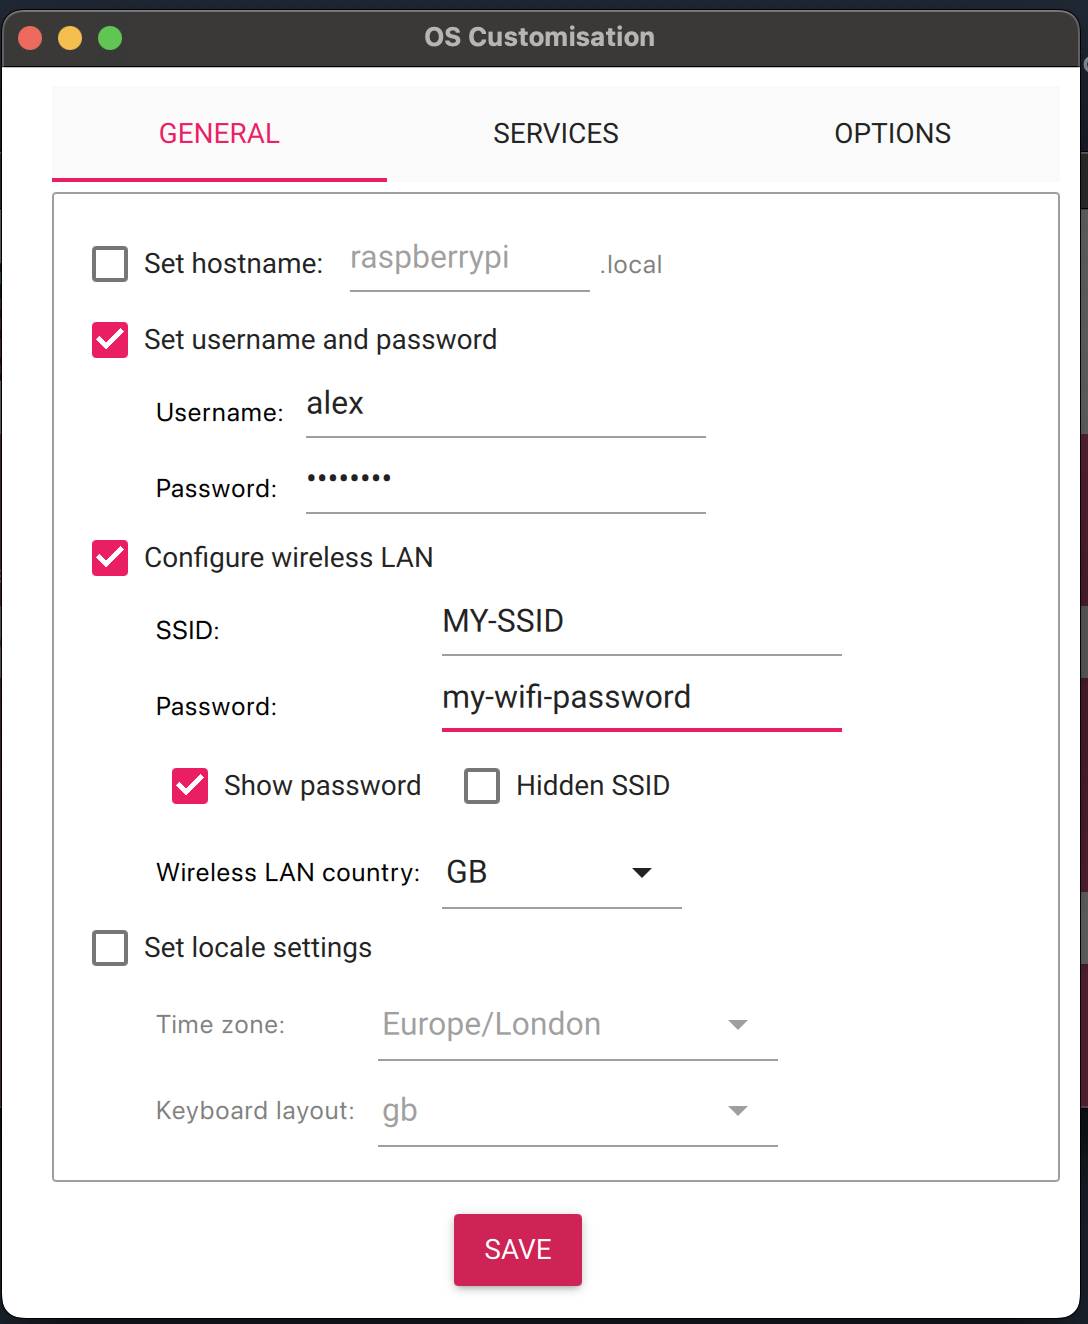
Under General, click on Set username and password and type in a username and a password you'll user to login the the Pi later on. If you'll be connecting the the Raspberry Pi using WiFi, click on Configure wireless LAN and enter you SSID and Password you use to connect. This can normally be found on the back of your router.
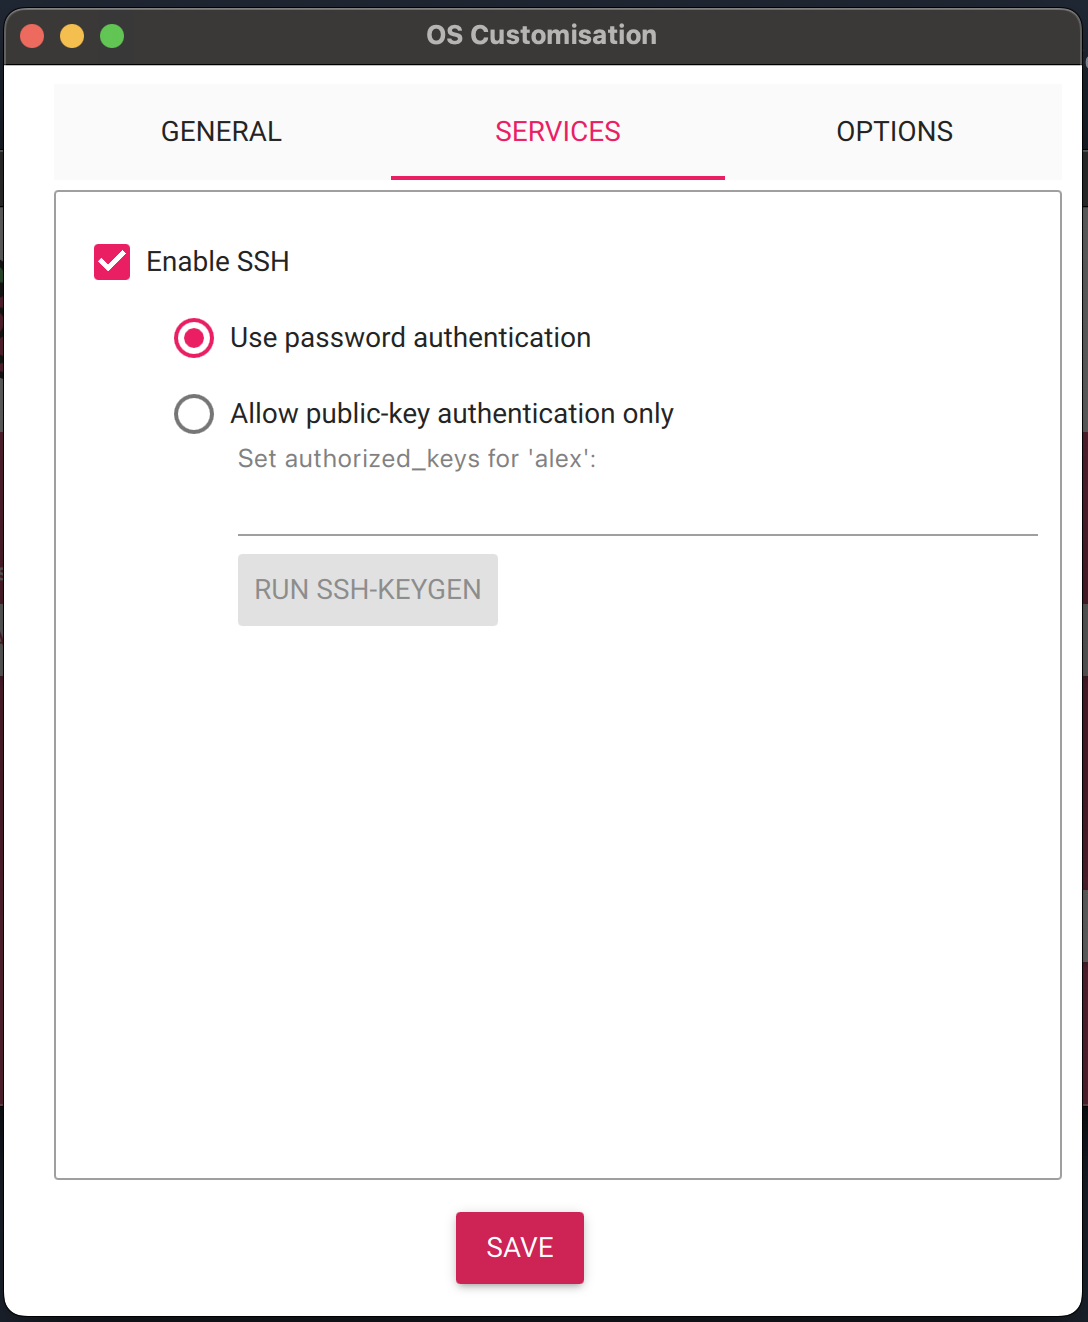
Next under the Services tab, click on Enable SSH and ensure Use password authentication is chosen. Then click save.
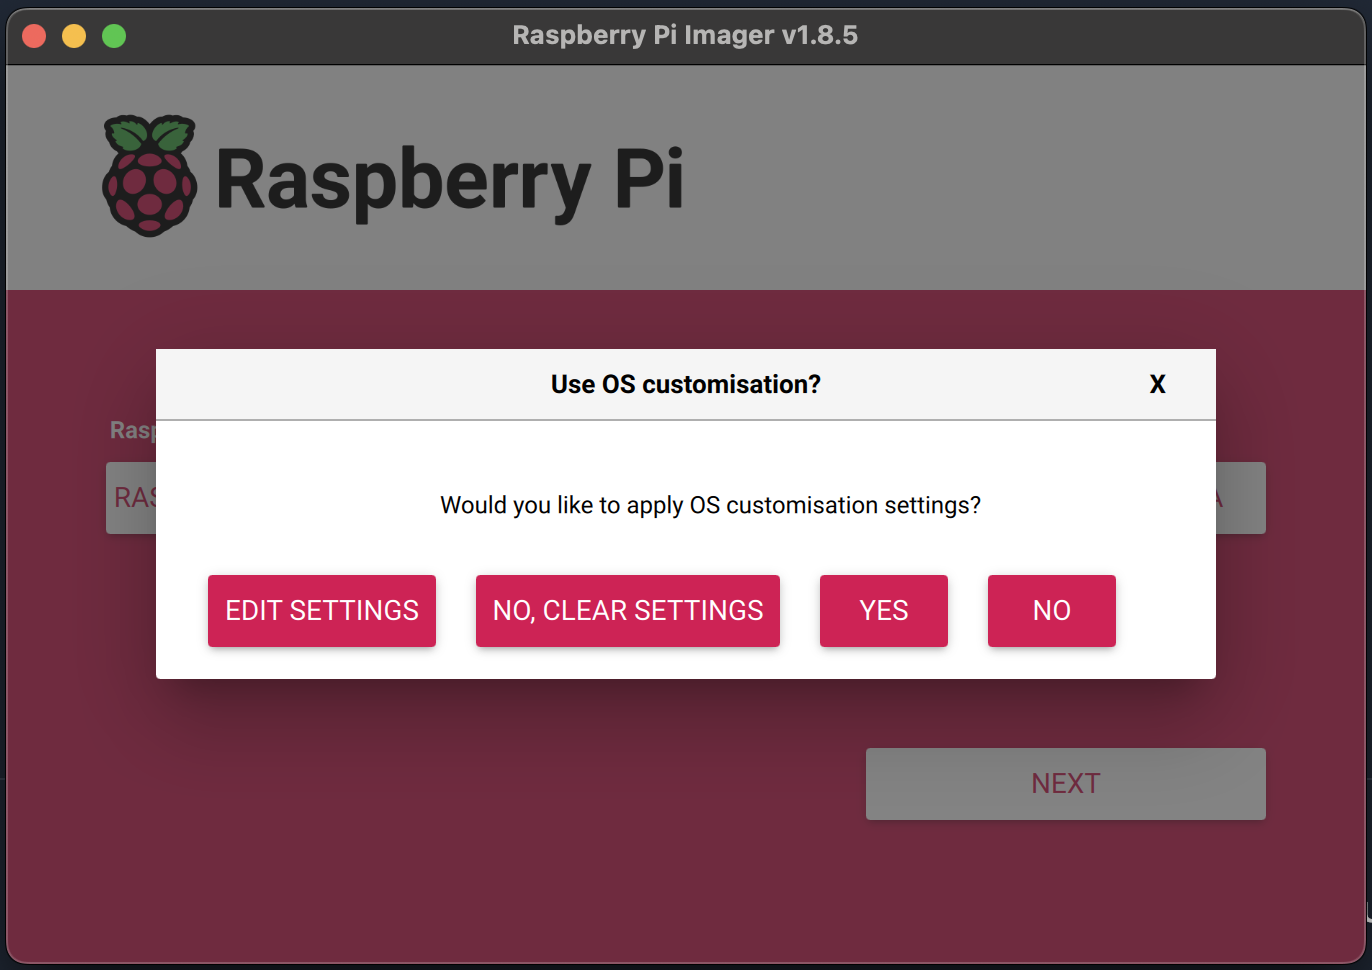
On the next screen click Yes:
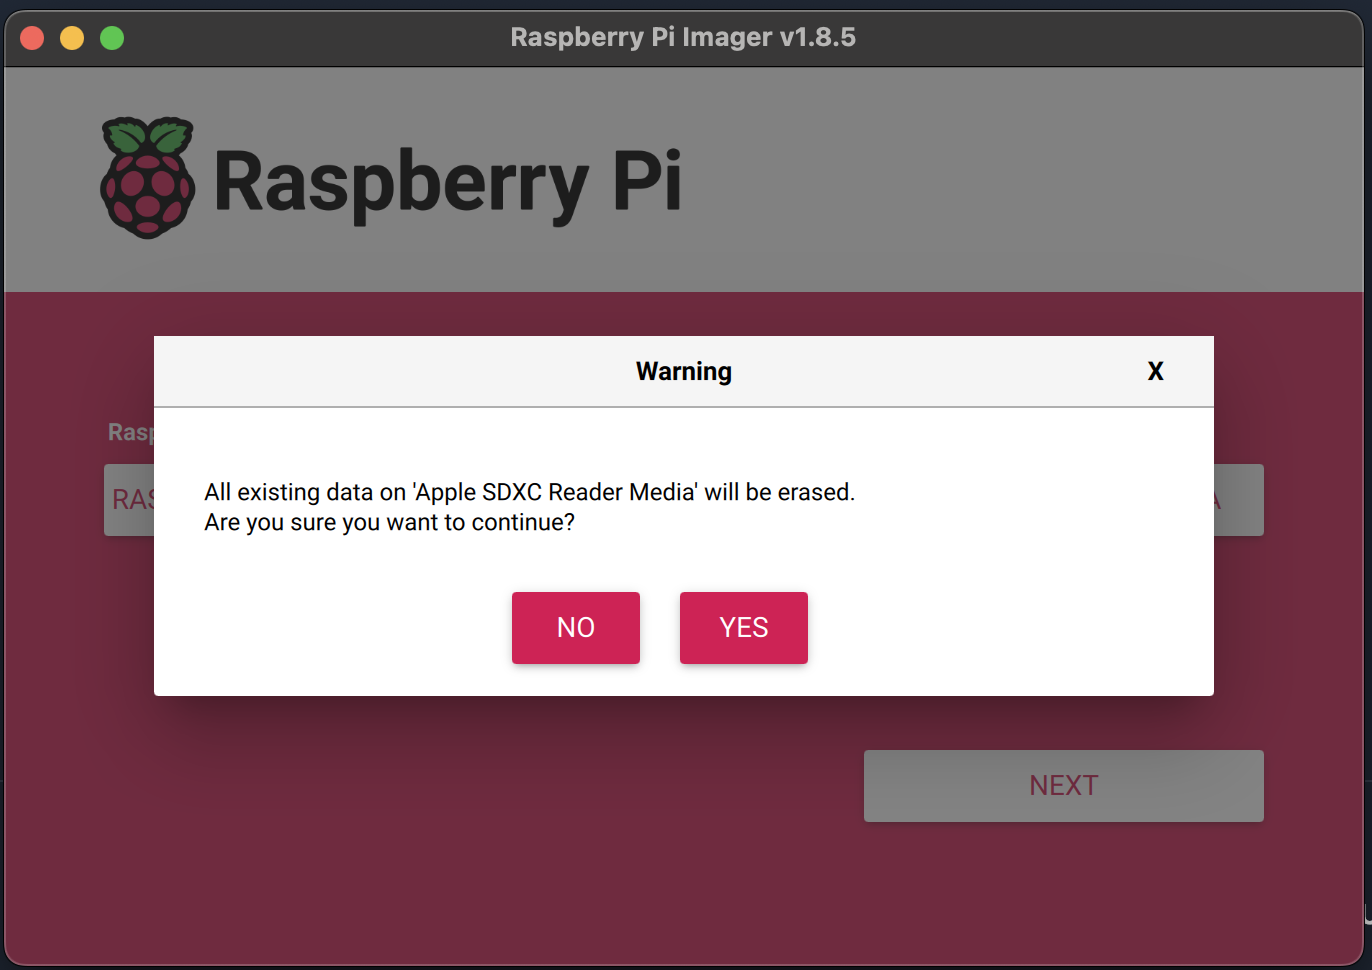
You'll then get asked to confirm if you want to continue, click Yes:
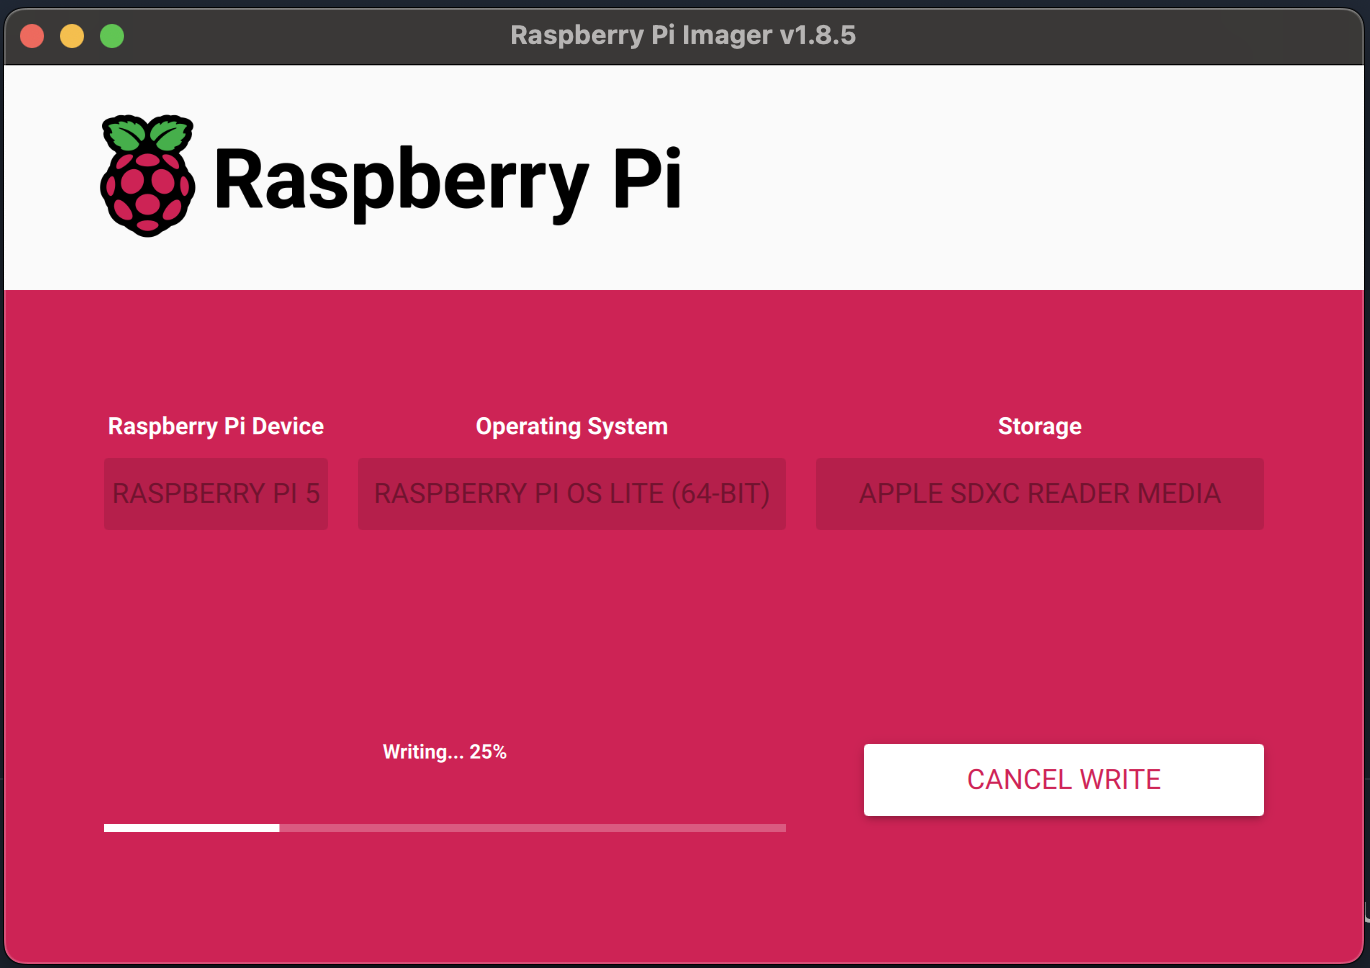
You'll then see the following screen while the SD card is being written to:
Afterwards you'll see a screen showing that Raspberry Pi OS has sucessfully been written to the SD card:
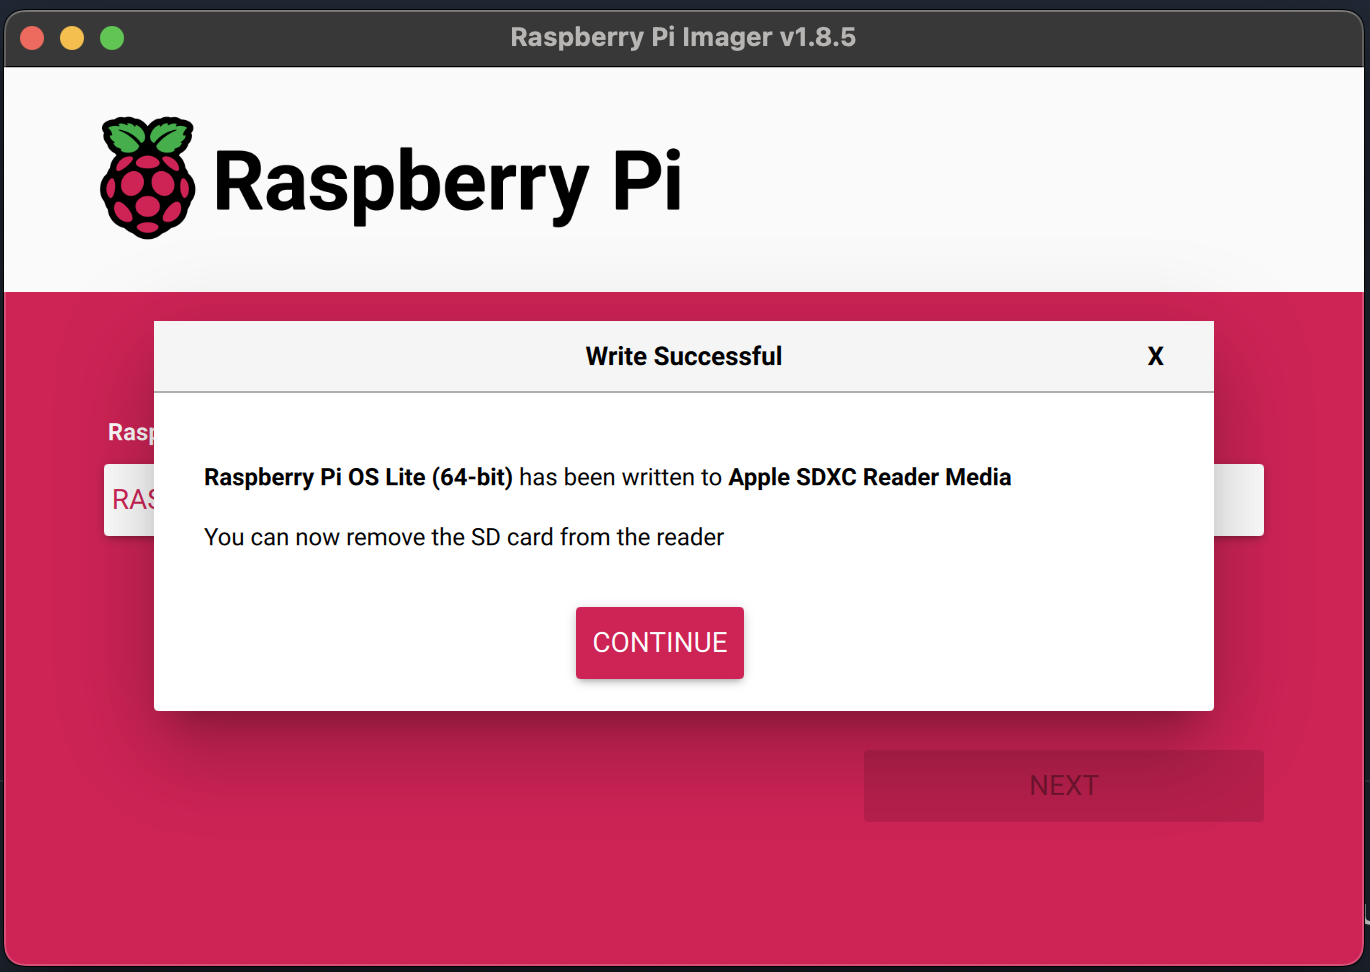
At this point, if it is not already, you can eject the SD card from you machine and plug it into the Raspberry Pi.
Finding the IP address of your Raspberry Pi
If you haven't already, insert the micro SD card into your Raspberry Pi that you set up in the previous section. If you're using an ethernet cable to connect the Pi to your router connect those now and then plug the USB-C power supply into the Pi and into a socket. You should see flashing LEDs on the computer confirming that it's on.
Finding the IP address of the Raspberry Pi
Before you can connect to the Raspberry Pi you need to determine it's IP address. There are several ways to do this.
Using ping
If you're using Windows, open the command prompt. If you're on macOS or Linux open the terminal. In both cases, type:
ping raspberrypi.local
You should see output similar to the following:
alex@raspberrypi:~ $ ping raspberrypi.local
PING raspberrypi.local (192.168.1.101) 56(84) bytes of data.
64 bytes from 192.168.1.101 (192.168.1.101): icmp_seq=1 ttl=64 time=0.060 ms
64 bytes from 192.168.1.101 (192.168.1.101): icmp_seq=2 ttl=64 time=0.075 ms
64 bytes from 192.168.1.101 (192.168.1.101): icmp_seq=3 ttl=64 time=0.069 ms
64 bytes from 192.168.1.101 (192.168.1.101): icmp_seq=4 ttl=64 time=0.057 ms
^C
--- raspberrypi.local ping statistics ---
4 packets transmitted, 4 received, 0% packet loss, time 3006ms
rtt min/avg/max/mdev = 0.057/0.065/0.075/0.007 ms
Press CTRL-C to stop pinging. We can see from this that the IP address is 192.168.1.101. The IP address of the machine on your network will likely be different.
Now you have the IP address you can continue to the next section.
If this doesn't work try the method below.
Using your routers admin interface
You can typically access your routers admin interface by typing 192.168.1.1 or 192.168.0.1 into your browsers address bar. A password is often needed. This can normally be found on the back of your router. You should look for something along the lines of Connected devices and it should list a device with the hostname raspberrypi and it's IP alongside it. There may be different sections for devices connected over WiFi and those connected over Ethernet.
Now you have the IP address you can continue to the next section.
If this doesn't work try the method below.
With a keyboard and monitor.
If you have a keyboard and monitor you can connect both to the Raspberry Pi. You should see on the screen a login prompt. It may ask for your username and password or only your password. Type in the password you entered in the previous section. Once you're logged in, type:
ip addr
You should see output similar to the following:
1: lo: <LOOPBACK,UP,LOWER_UP> mtu 65536 qdisc noqueue state UNKNOWN group default qlen 1000
    link/loopback 00:00:00:00:00:00 brd 00:00:00:00:00:00
    inet 127.0.0.1/8 scope host lo
       valid_lft forever preferred_lft forever
    inet6 ::1/128 scope host noprefixroute
       valid_lft forever preferred_lft forever
2: eth0: <NO-CARRIER,BROADCAST,MULTICAST,UP> mtu 1500 qdisc mq state DOWN group default qlen 1000
    link/ether dc:a6:32:80:db:a1 brd ff:ff:ff:ff:ff:ff
3: wlan0: <BROADCAST,MULTICAST,UP,LOWER_UP> mtu 1500 qdisc pfifo_fast state UP group default qlen 1000
    link/ether dc:a6:32:80:db:a2 brd ff:ff:ff:ff:ff:ff
    inet 192.168.1.101/24 brd 192.168.1.255 scope global dynamic noprefixroute wlan0
       valid_lft 85456sec preferred_lft 85456sec
    inet6 fe80::6a1f:7bbb:7e23:1e26/64 scope link noprefixroute
       valid_lft forever preferred_lft forever
If the Raspberry Pi is connected over Wifi you'll see you IP address under the wlan0 section. Mine is 192.168.1.101 (you can ignore the /24 part.) If you're using ethernet you should see similar output in the eth0 section.
Once you have the IP address you should logout by typing:
exit
And hitting enter. You can now unplug the keyboard and monitor.
Now you have the IP address you can continue to the next section.
If this doesn't work try the method below.
Other methods
If none of these methods work for you there are other things you can try and various online guides (try searching "finding the IP address of my Raspberry Pi"). You may have entered your WiFi SSID and password in incorrectly in the previous step. If this is the case, try repeating the instructions in the previous section.
Once you've found the IP address of you Pi you can continue to the next section.
Connecting to the Raspberry Pi
Now that you have the IP address of your Raspberry Pi, you can connect to it over SSH using you PC or Laptop.
Windows
First download and install Putty from the PuTTy downloads page making sure to select the correct MSI installer. In most cases this will be 64-bit x86.
Once PuTTY is downloaded, open it and you should see a windows like the following:

In the Host Name (or IP address) field type the IP address of the Raspberry Pi found in Finding the IP address of your Raspberry Pi. You'll then be prompted for your username and password. Enter the username and password you configured from Setting up the Raspberry Pi. You may be asked if you want to continue connecting. Go ahead. You should then see a window with something similar to the following:
Linux raspberrypi 6.6.51+rpt-rpi-v8 #1 SMP PREEMPT Debian 1:6.6.51-1+rpt3 (2024-10-08) aarch64

The programs included with the Debian GNU/Linux system are free software;
the exact distribution terms for each program are described in the
individual files in /usr/share/doc/*/copyright.

Debian GNU/Linux comes with ABSOLUTELY NO WARRANTY, to the extent
permitted by applicable law.
Last login: Tue Nov 19 13:40:25 2024 from 192.168.1.103
alex@raspberrypi:~ $
Keeping this window open, continue to the next section.
macOS/Linux
Replacing <username> with the username you configured from Setting up the Raspberry Pi and <ip address> with the IP of your Raspberry Pi found in Finding the IP address of your Raspberry Pi, type the following:
ssh <username>@<ip address>
You should see something similar to:
The authenticity of host '192.168.1.101 (192.168.1.101)' can't be established.
ED25519 key fingerprint is SHA256:kG6+FTNwcuRN8PNKJdTgOusoKX0e0ooiDZV1ZhrXGSg.
This host key is known by the following other names/addresses:
    ~/.ssh/known_hosts:108: raspberrypi.local
Are you sure you want to continue connecting (yes/no/[fingerprint])?
Type yes and hit enter.
You'll then be prompted for your password:
alex@192.168.1.101's password:
Type the password you entered in Setting up the Raspberry Pi and hit enter.
You should then see something similar to the following:
Linux raspberrypi 6.6.51+rpt-rpi-v8 #1 SMP PREEMPT Debian 1:6.6.51-1+rpt3 (2024-10-08) aarch64

The programs included with the Debian GNU/Linux system are free software;
the exact distribution terms for each program are described in the
individual files in /usr/share/doc/*/copyright.

Debian GNU/Linux comes with ABSOLUTELY NO WARRANTY, to the extent
permitted by applicable law.
Last login: Tue Nov 19 13:40:25 2024 from 192.168.1.103
alex@raspberrypi:~ $
Keeping the terminal open, continue to the next section.
Installing 3DFarm
You should have the terminal open and be connected to the Raspberry Pi at this stage. This is important for the next steps.
If you haven't done so already head over to https://3dfarm.io/signup and create an account. After you've hit sign up and opened the link in the email you'll be asked to select a plan. You can come back to this later. For now, click Print in the top navigation bar. You should see something similar to the following:
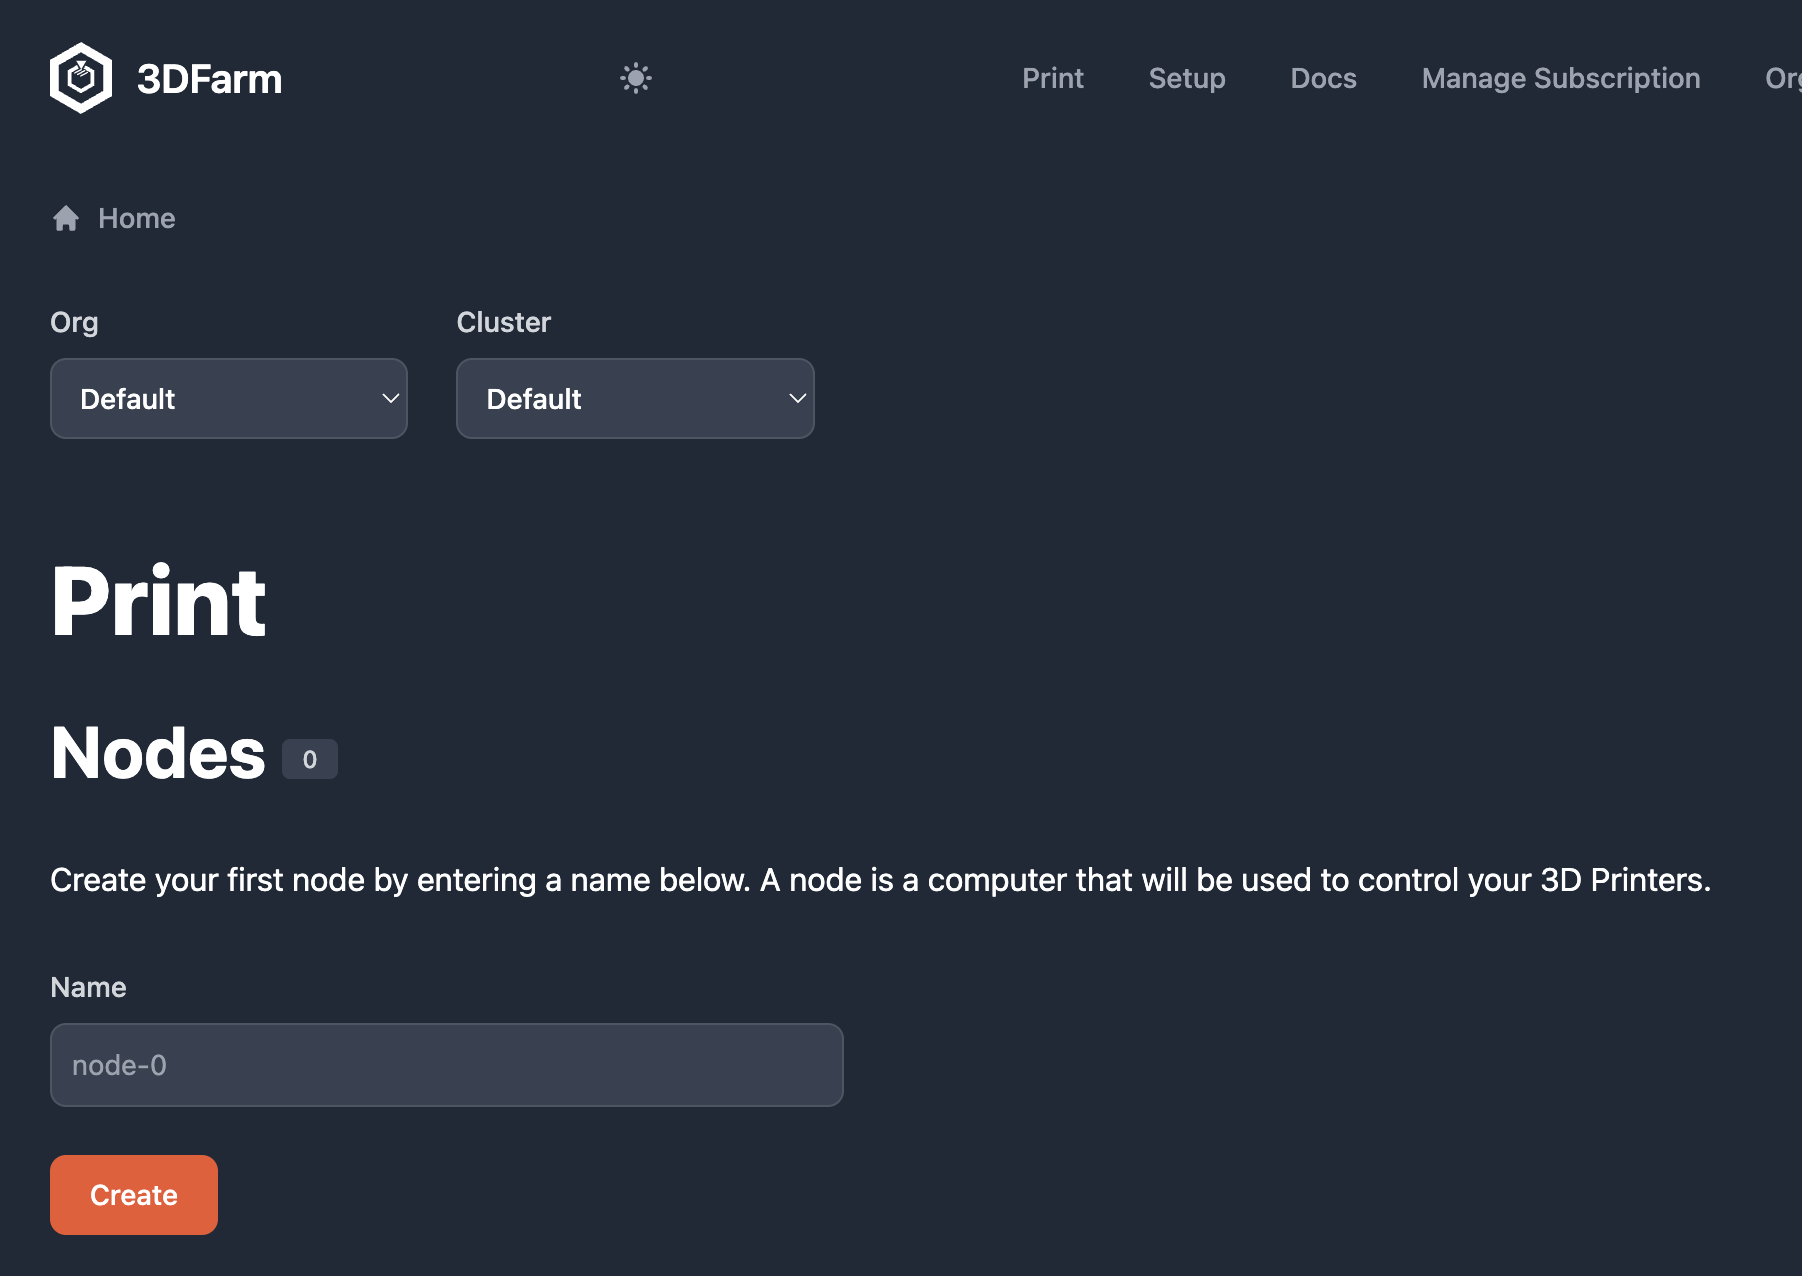
Here there is a section for creating your first node.
Terminology
Before we continue it's useful to know the three main concepts in 3DFarm.
Node
A Node is a computer to which you connect your 3D Printers. Nodes connect to 3DFarm to allow you to control your printers through the web interface located at https://3dfarm.io.
Cluster
A Cluster is a group of nodes. A print farm typically has many printers and due to physical limitations of how many printers can be connected to a single node, more than one node may be required. You can read more about this in How many printers can I connect?. When you create your account a Default cluster is created for you.
Organisation
An Organisation is a group of clusters. A large print farm or an institutions such universities and schools may have different departments or classrooms each with their own set or printers. Clusters can be used to group these printers. When you create your account a Default organisation is created for you.
Create your first node
In the name field, type the name of the node. This is only really important for large print farms. For now type e.g. node-0 and click Create:
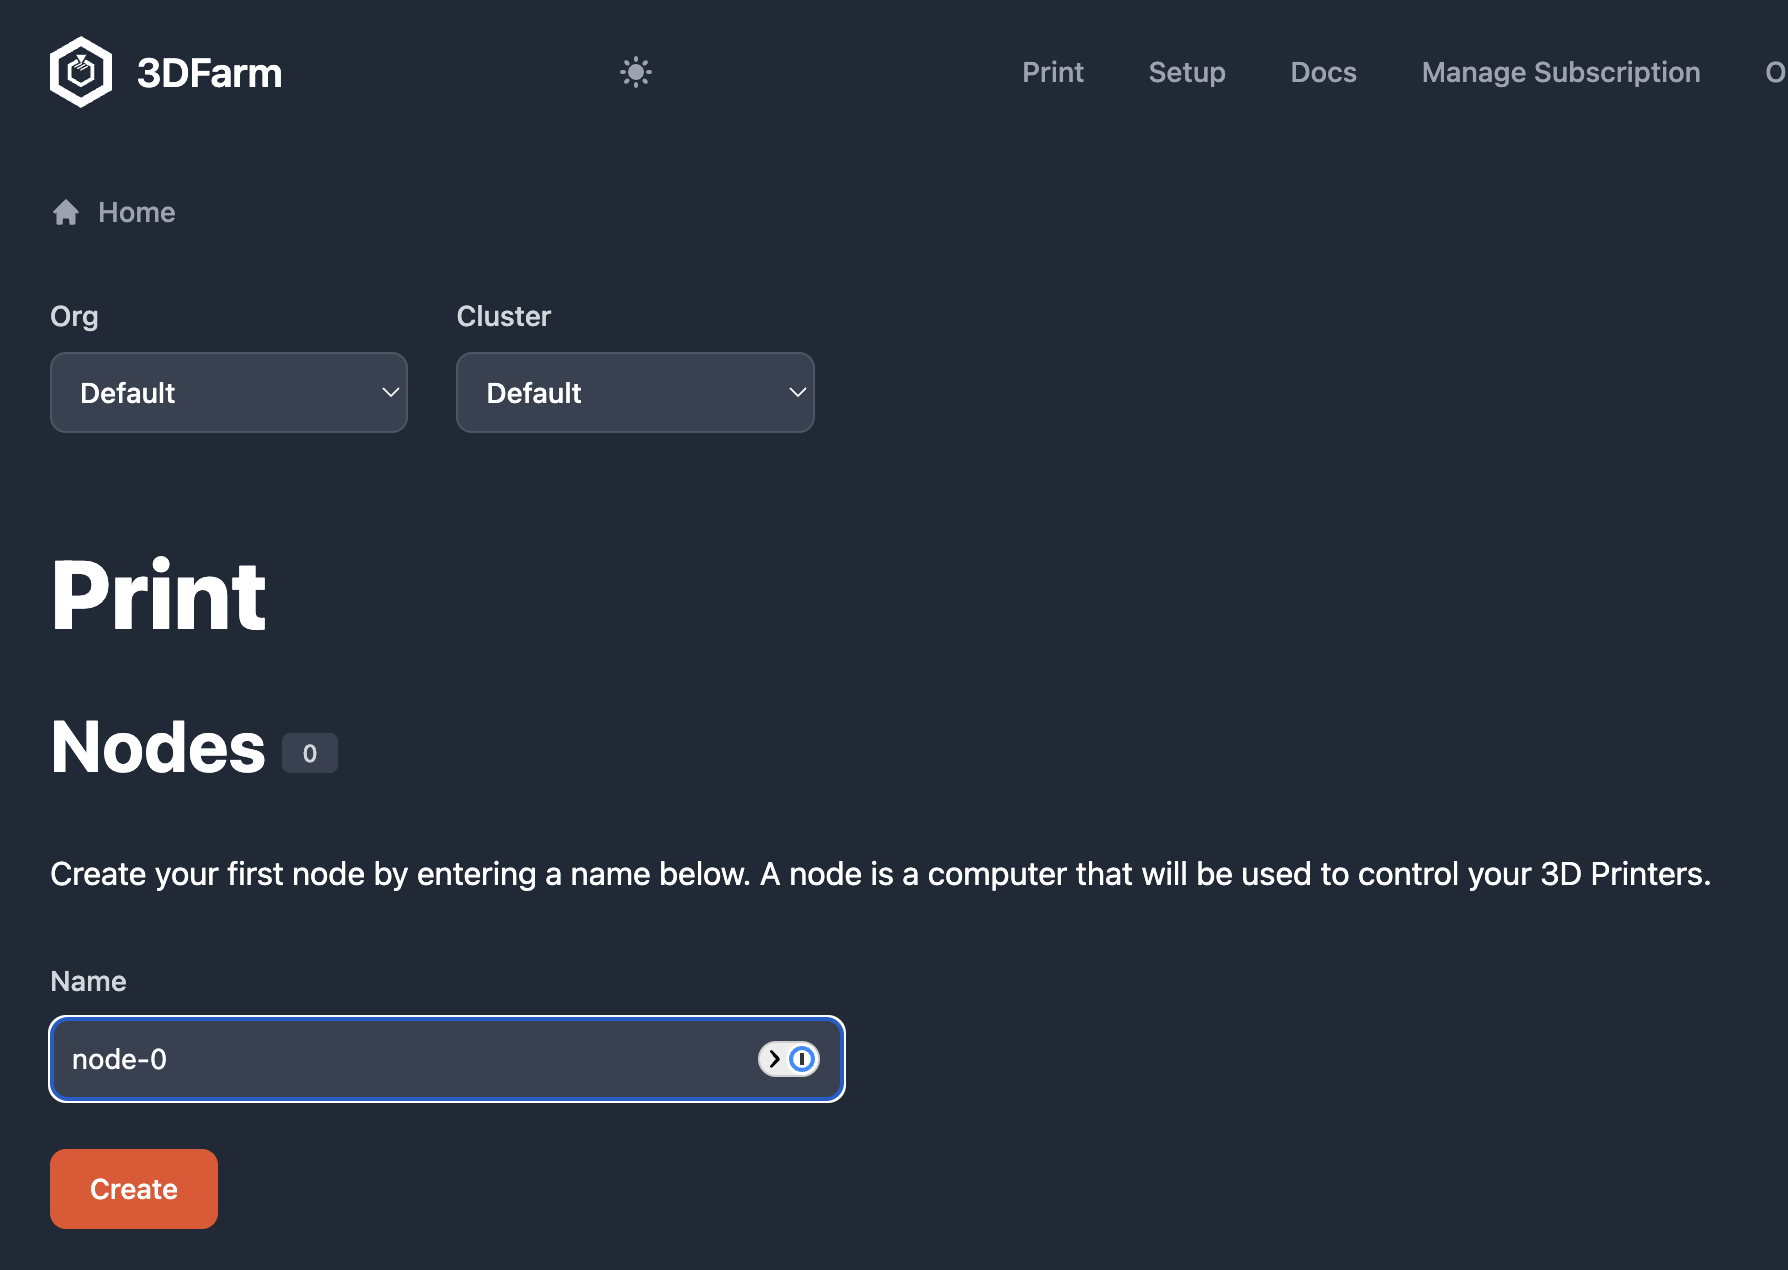
After clicking Create you should see the something like the following:
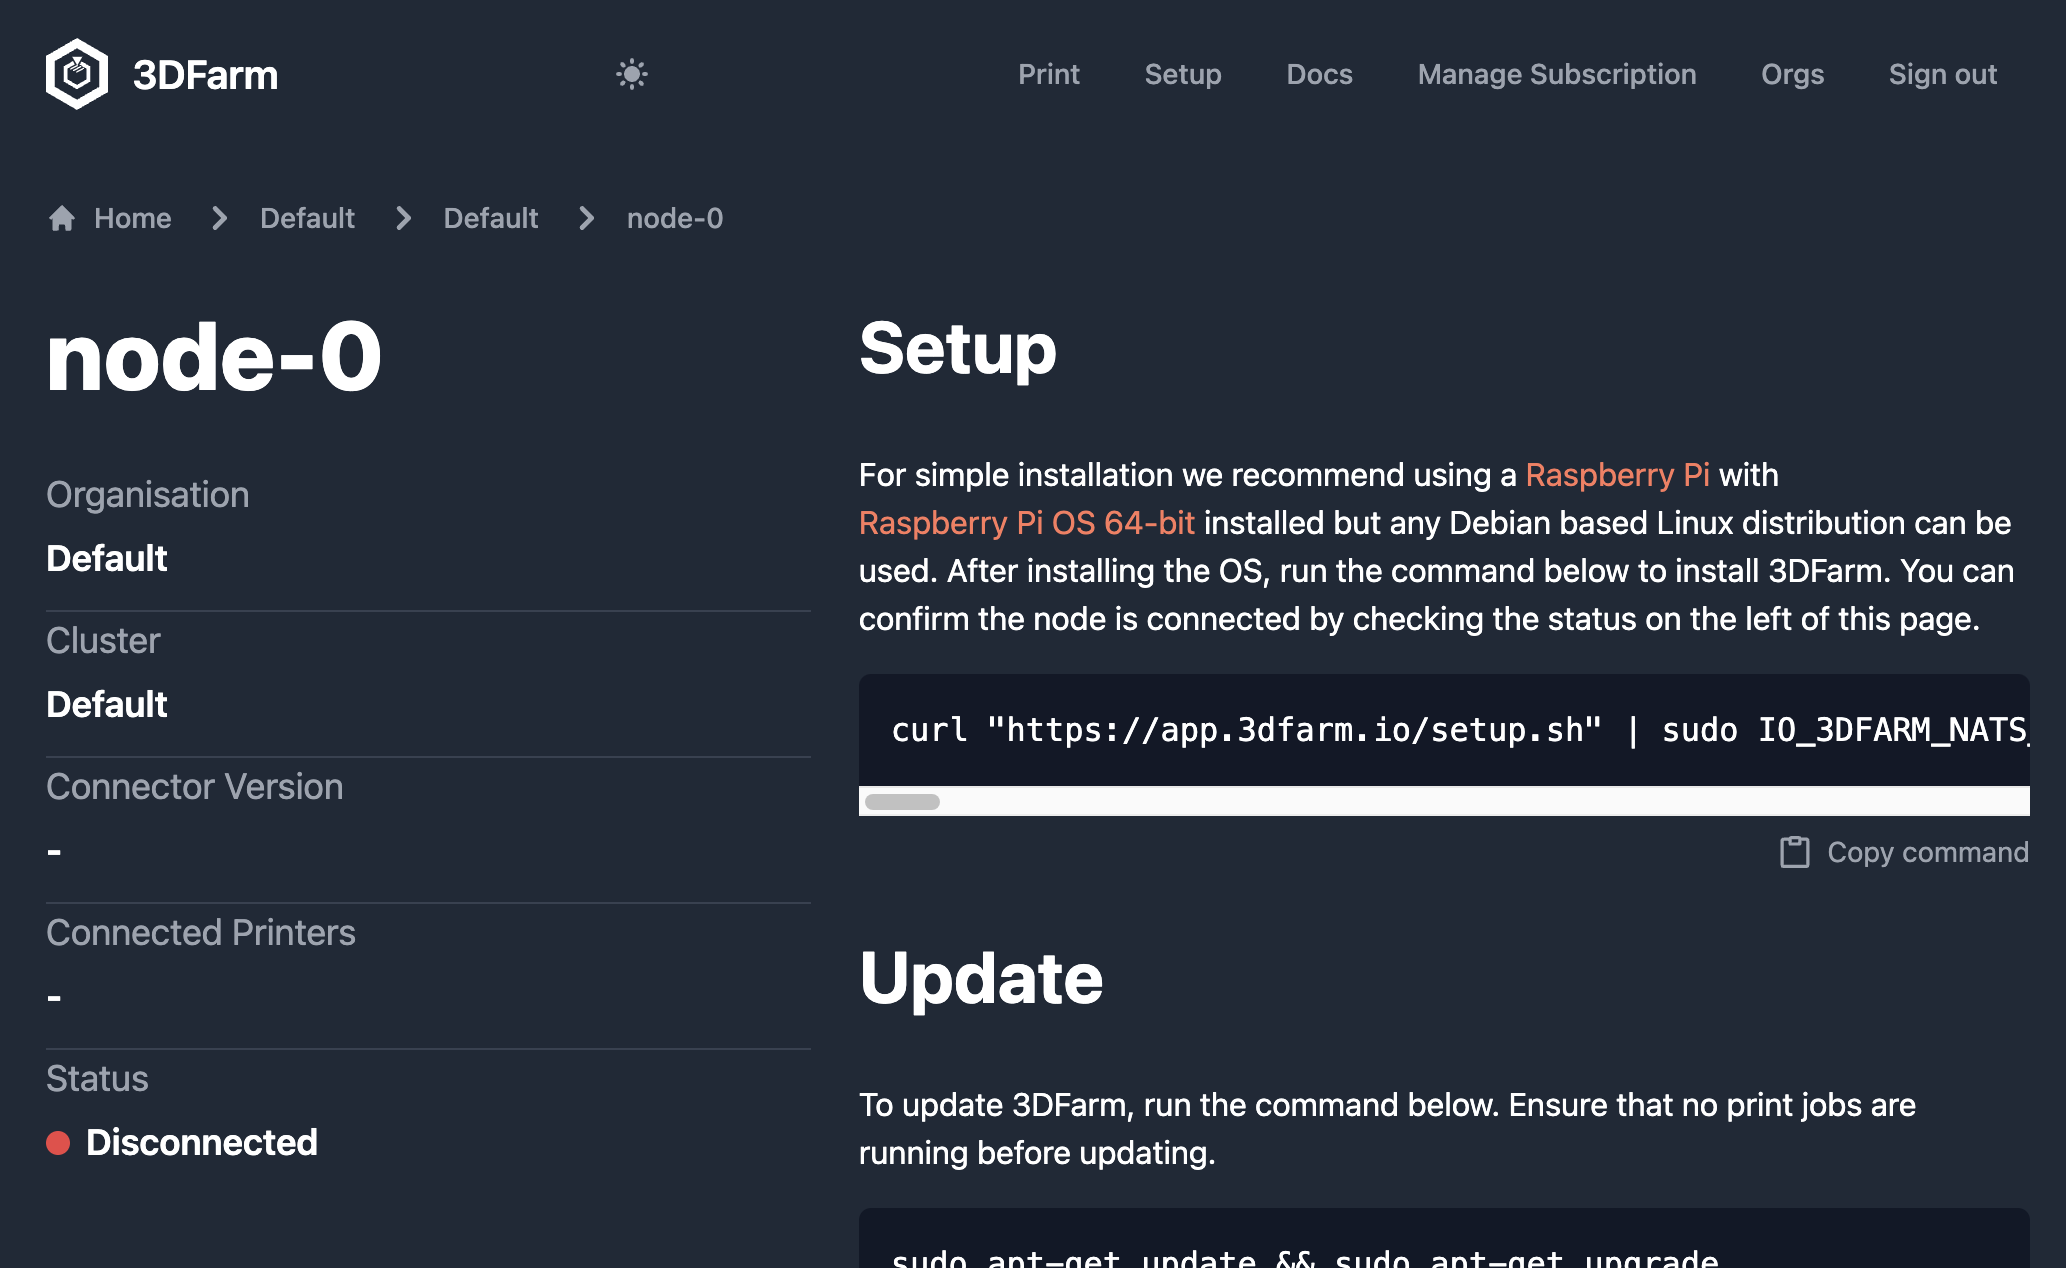
The command there that starts with curl ... is what you need to install 3DFarm on the Raspberry Pi. Click Copy command and then head back to your terminal, paste using CTRL-V on Windows/Linux or CMD-V on macOS and hit enter. This will result in the following:

3DFarm is now installed and you can now close your terminal, disconnecting from the Raspberry Pi.
Refreshing the page on 3DFarm should show that the node is connected.
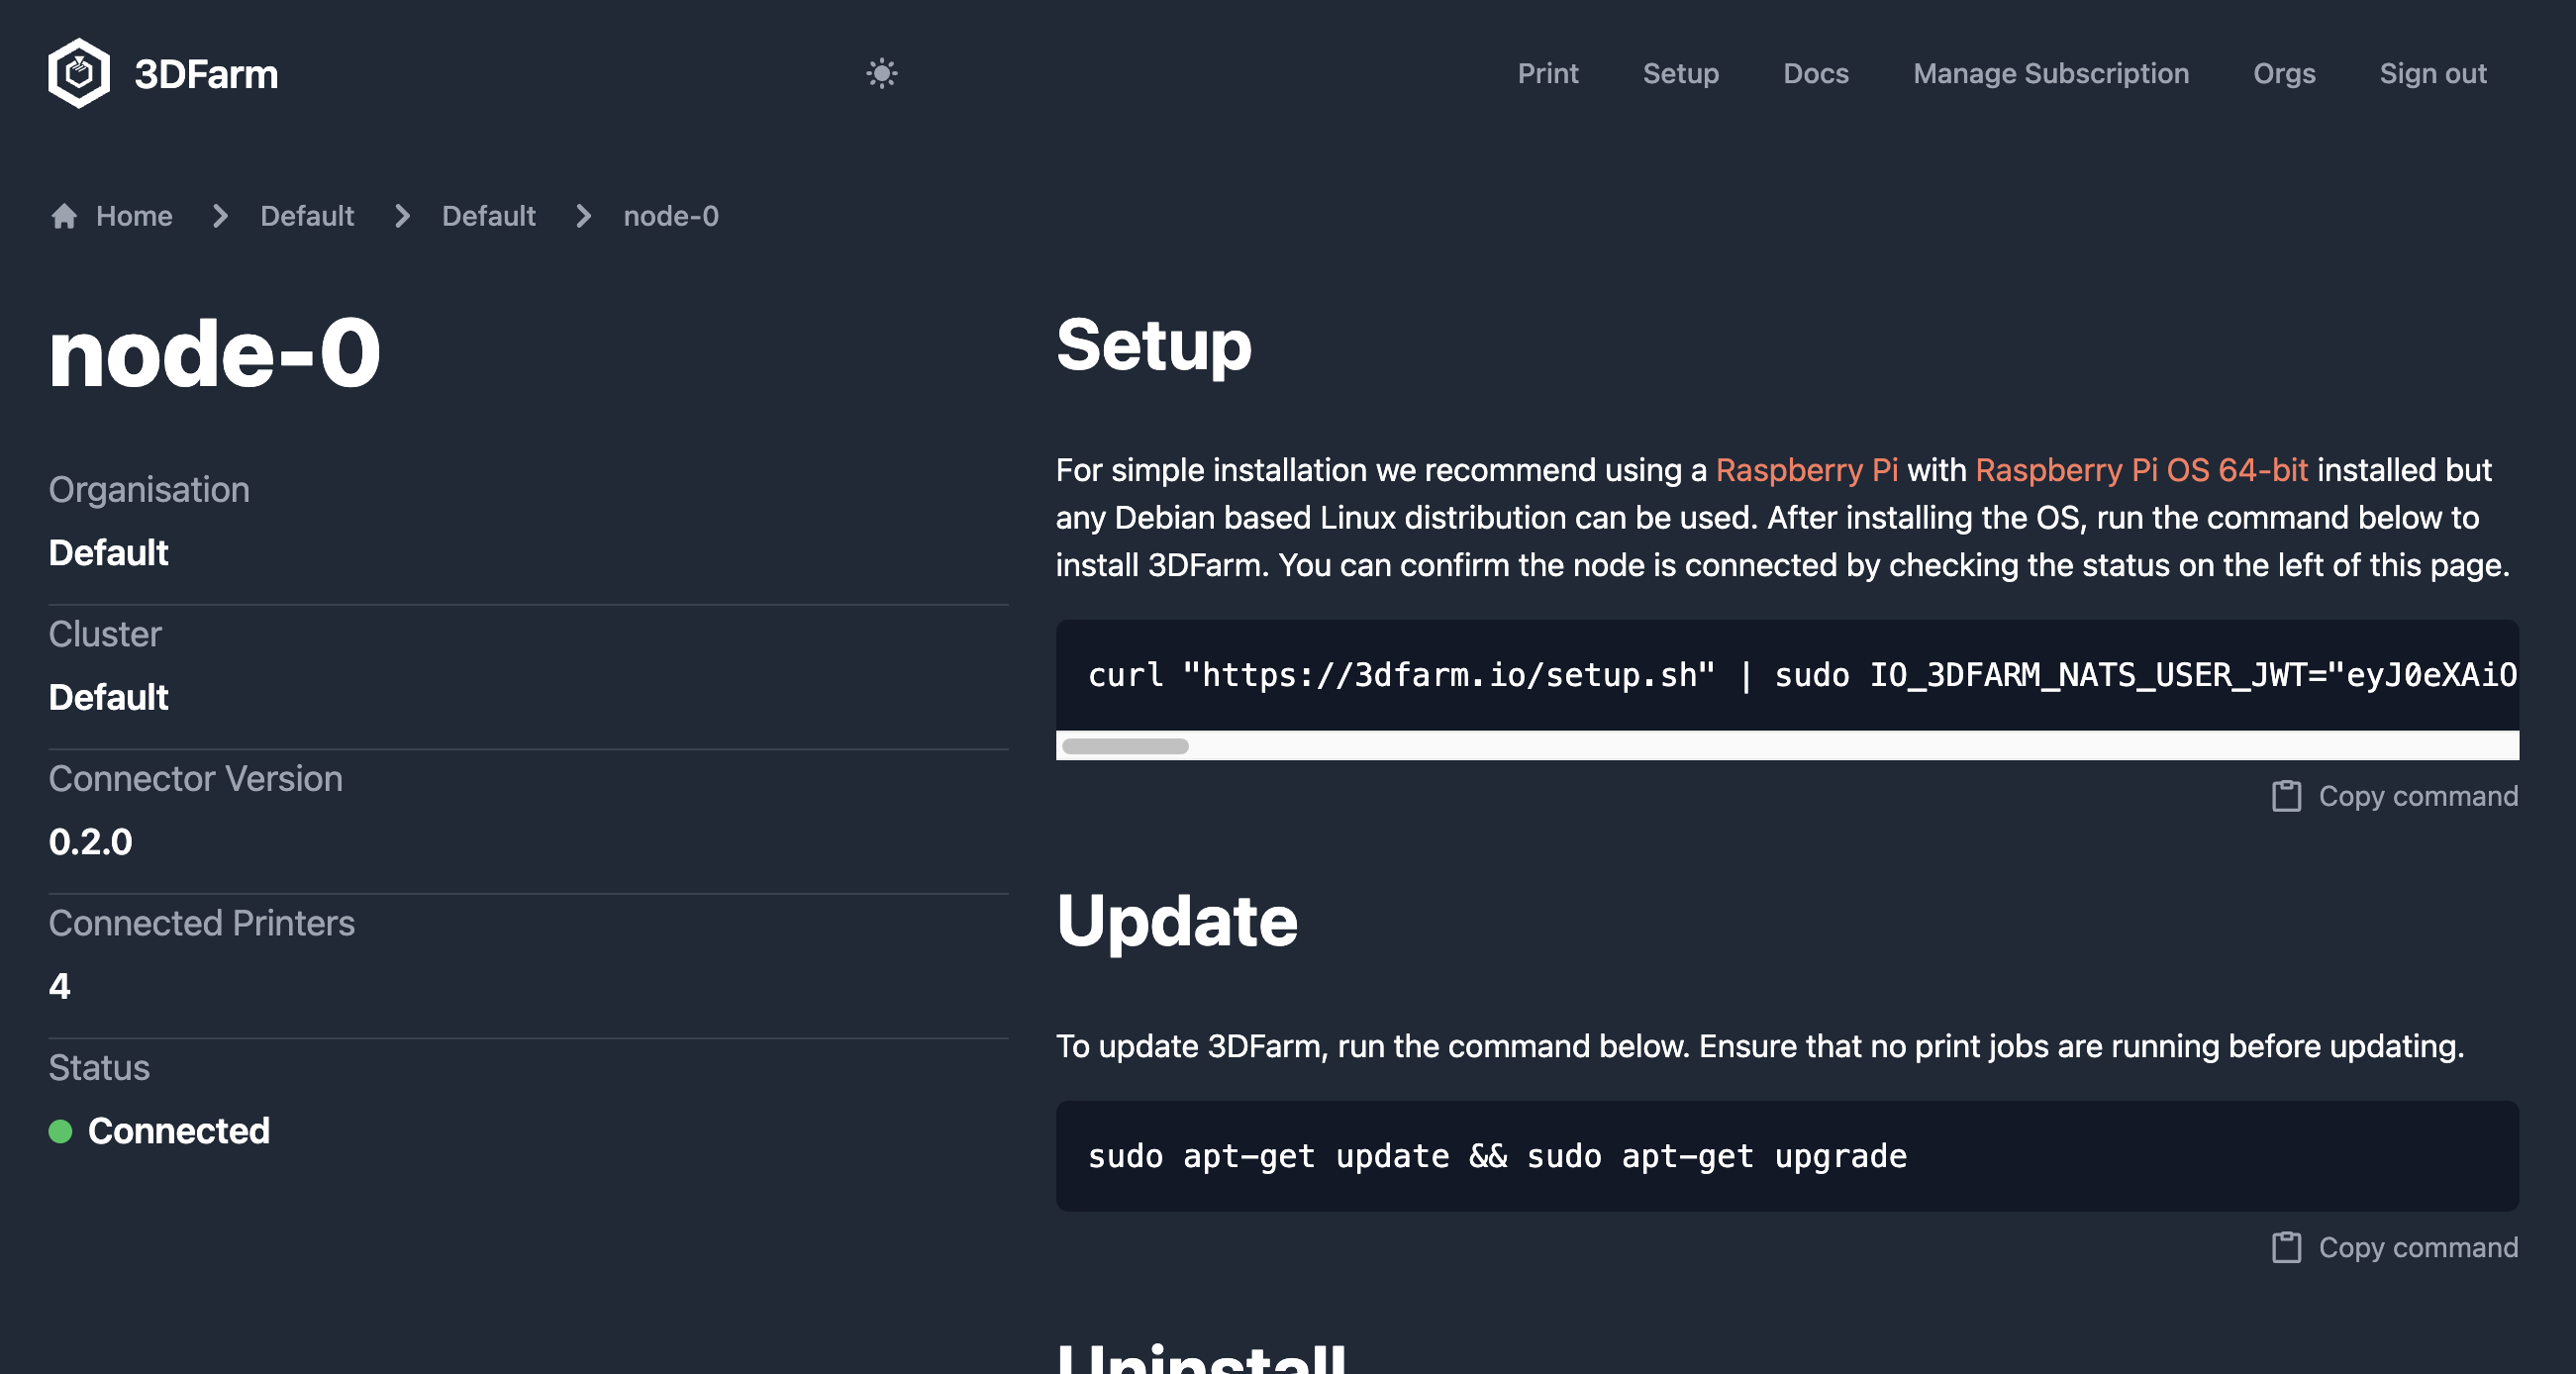
Click Print in the top section and continue to the next section to start printing.
Connecting your 3D Printers
I'm using 3DFarm Lite which lets me control two 3D Printers with basic monitoring and controls. After plugging the two printers in you should see something like the following:
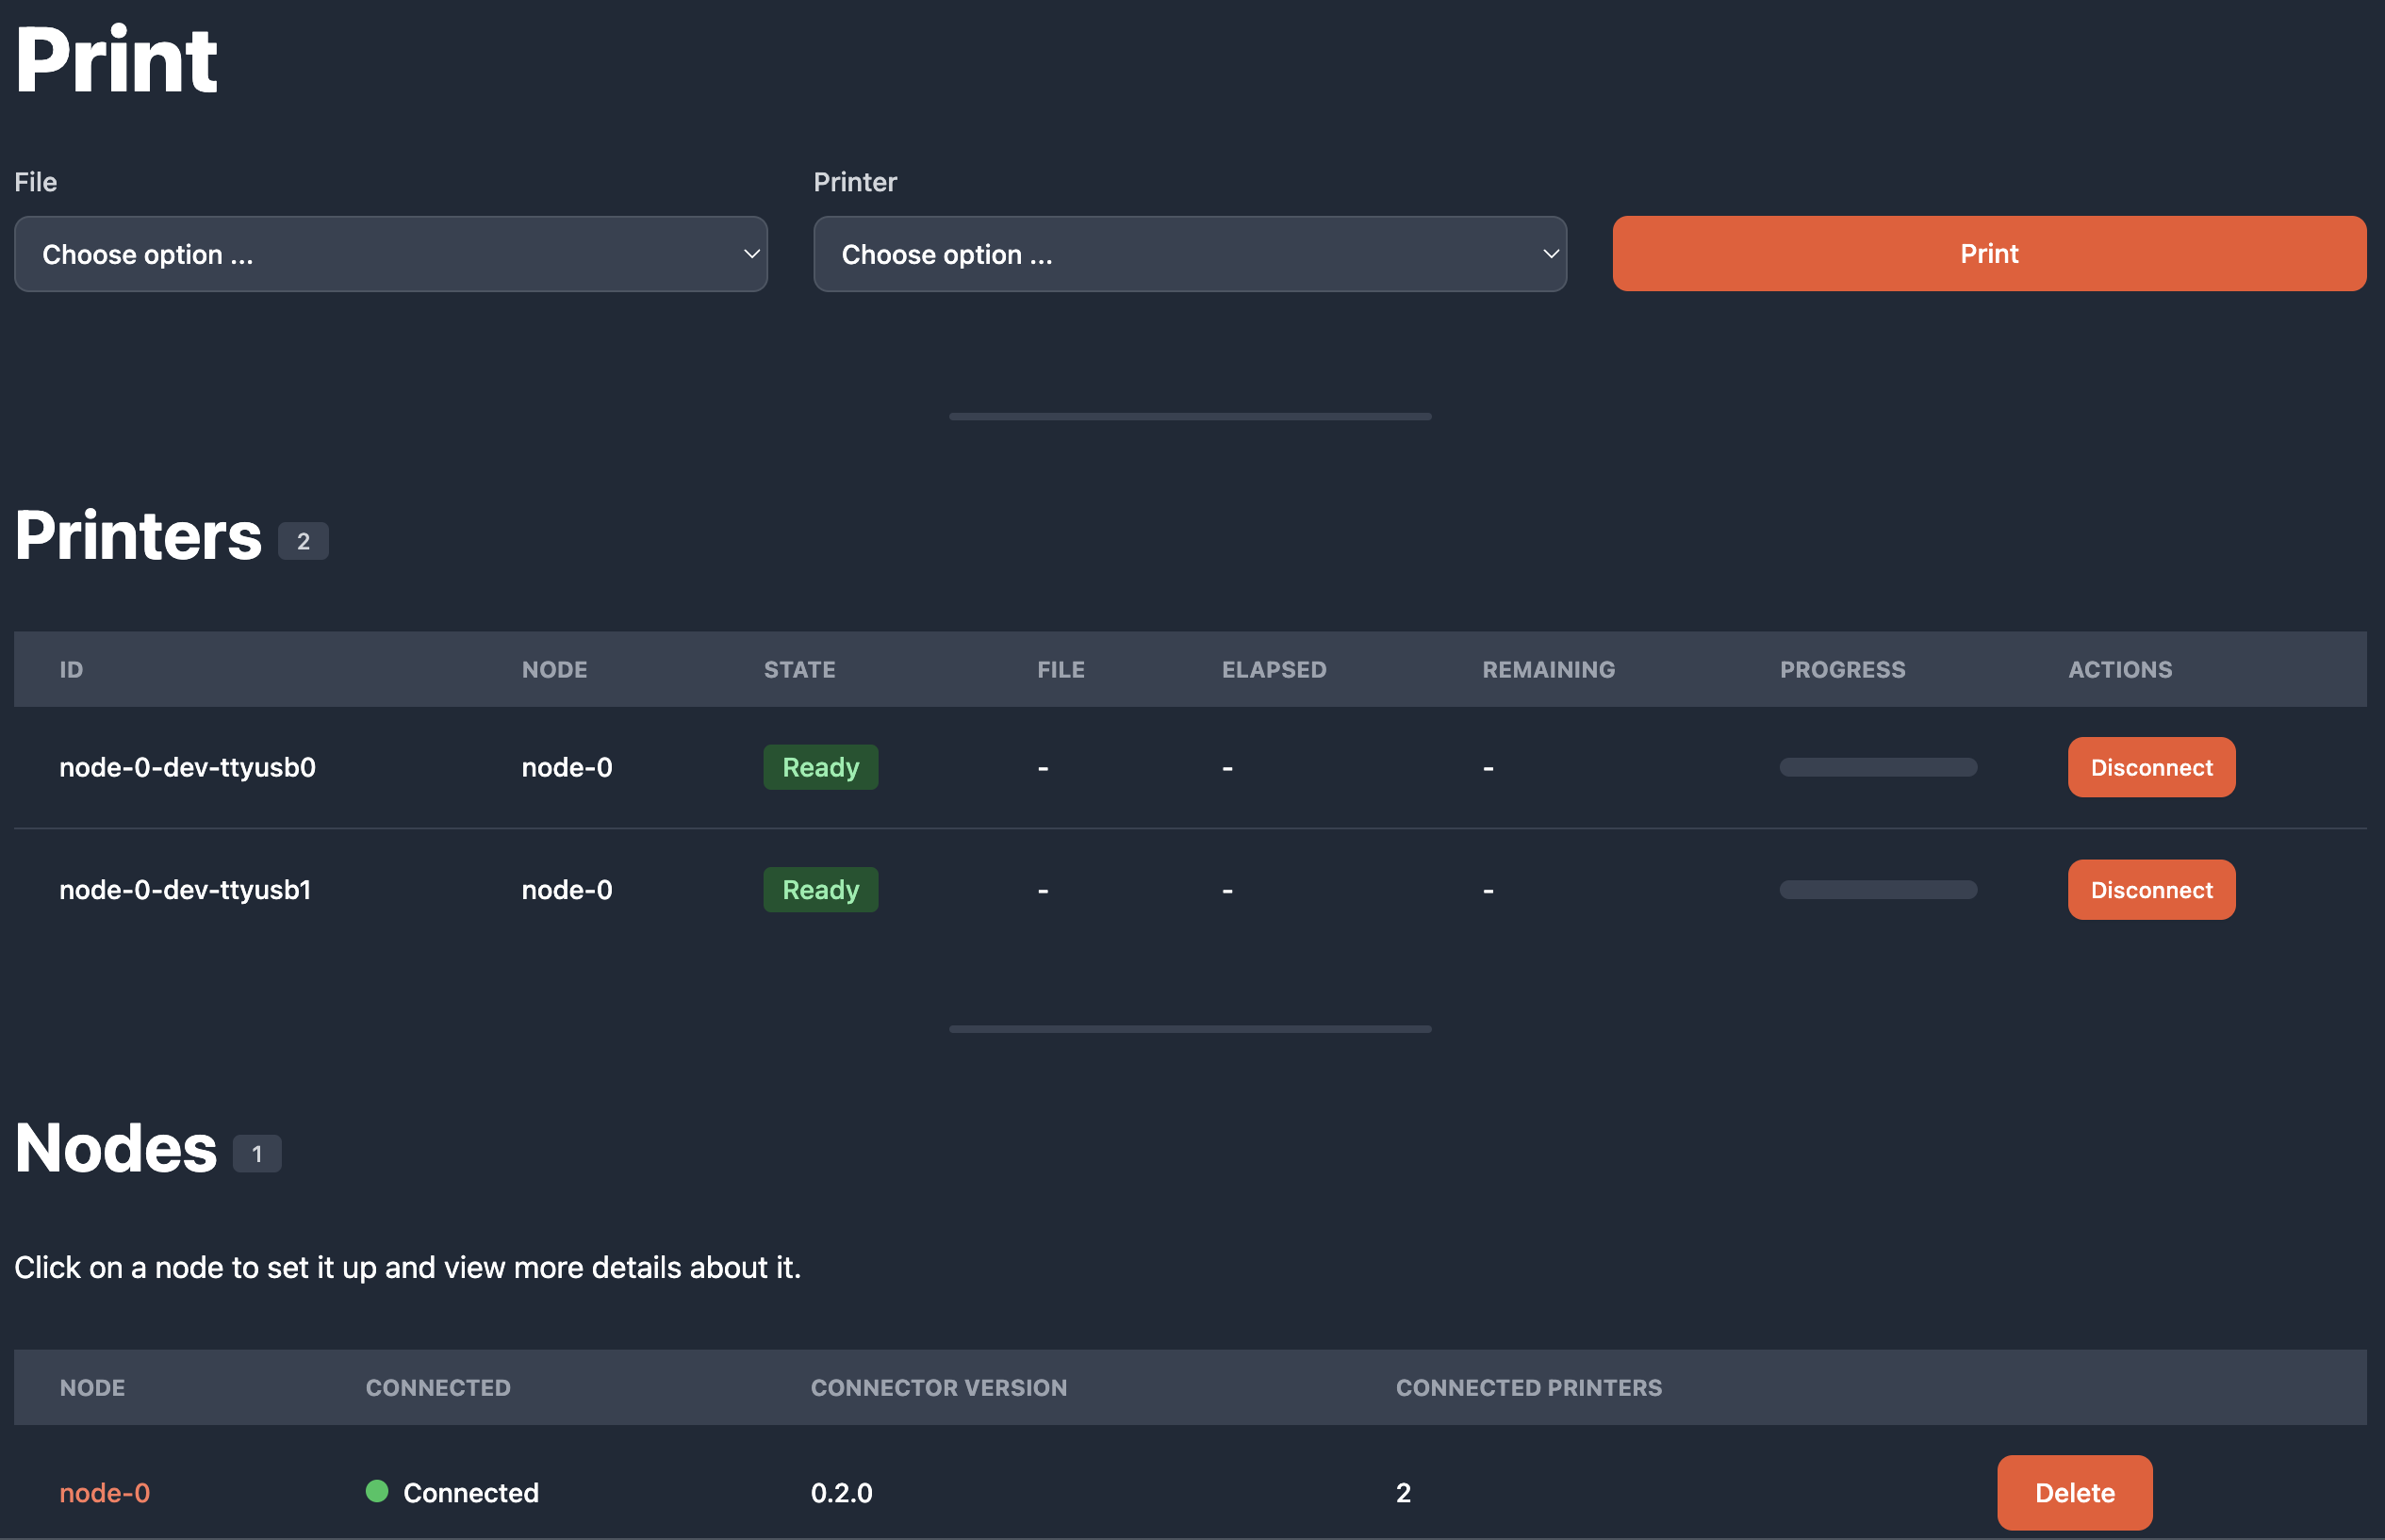
Controlling your 3D Printers
Uploading files
To begin printing, first upload a file by scrolling to the bottom of the page.

I'm going to upload a basic cube. Click on choose file, select a file, in my case "cube.gcode" and click Upload.

This file is now safely stored in the cloud. I'm using 3DFarm Lite so the file will automatically be deleted from my account in 14 days. Different plans have different file retention limits. Files stored in the cloud are safe and persistent even if your node goes offline until the rention limit is reached.
Printing
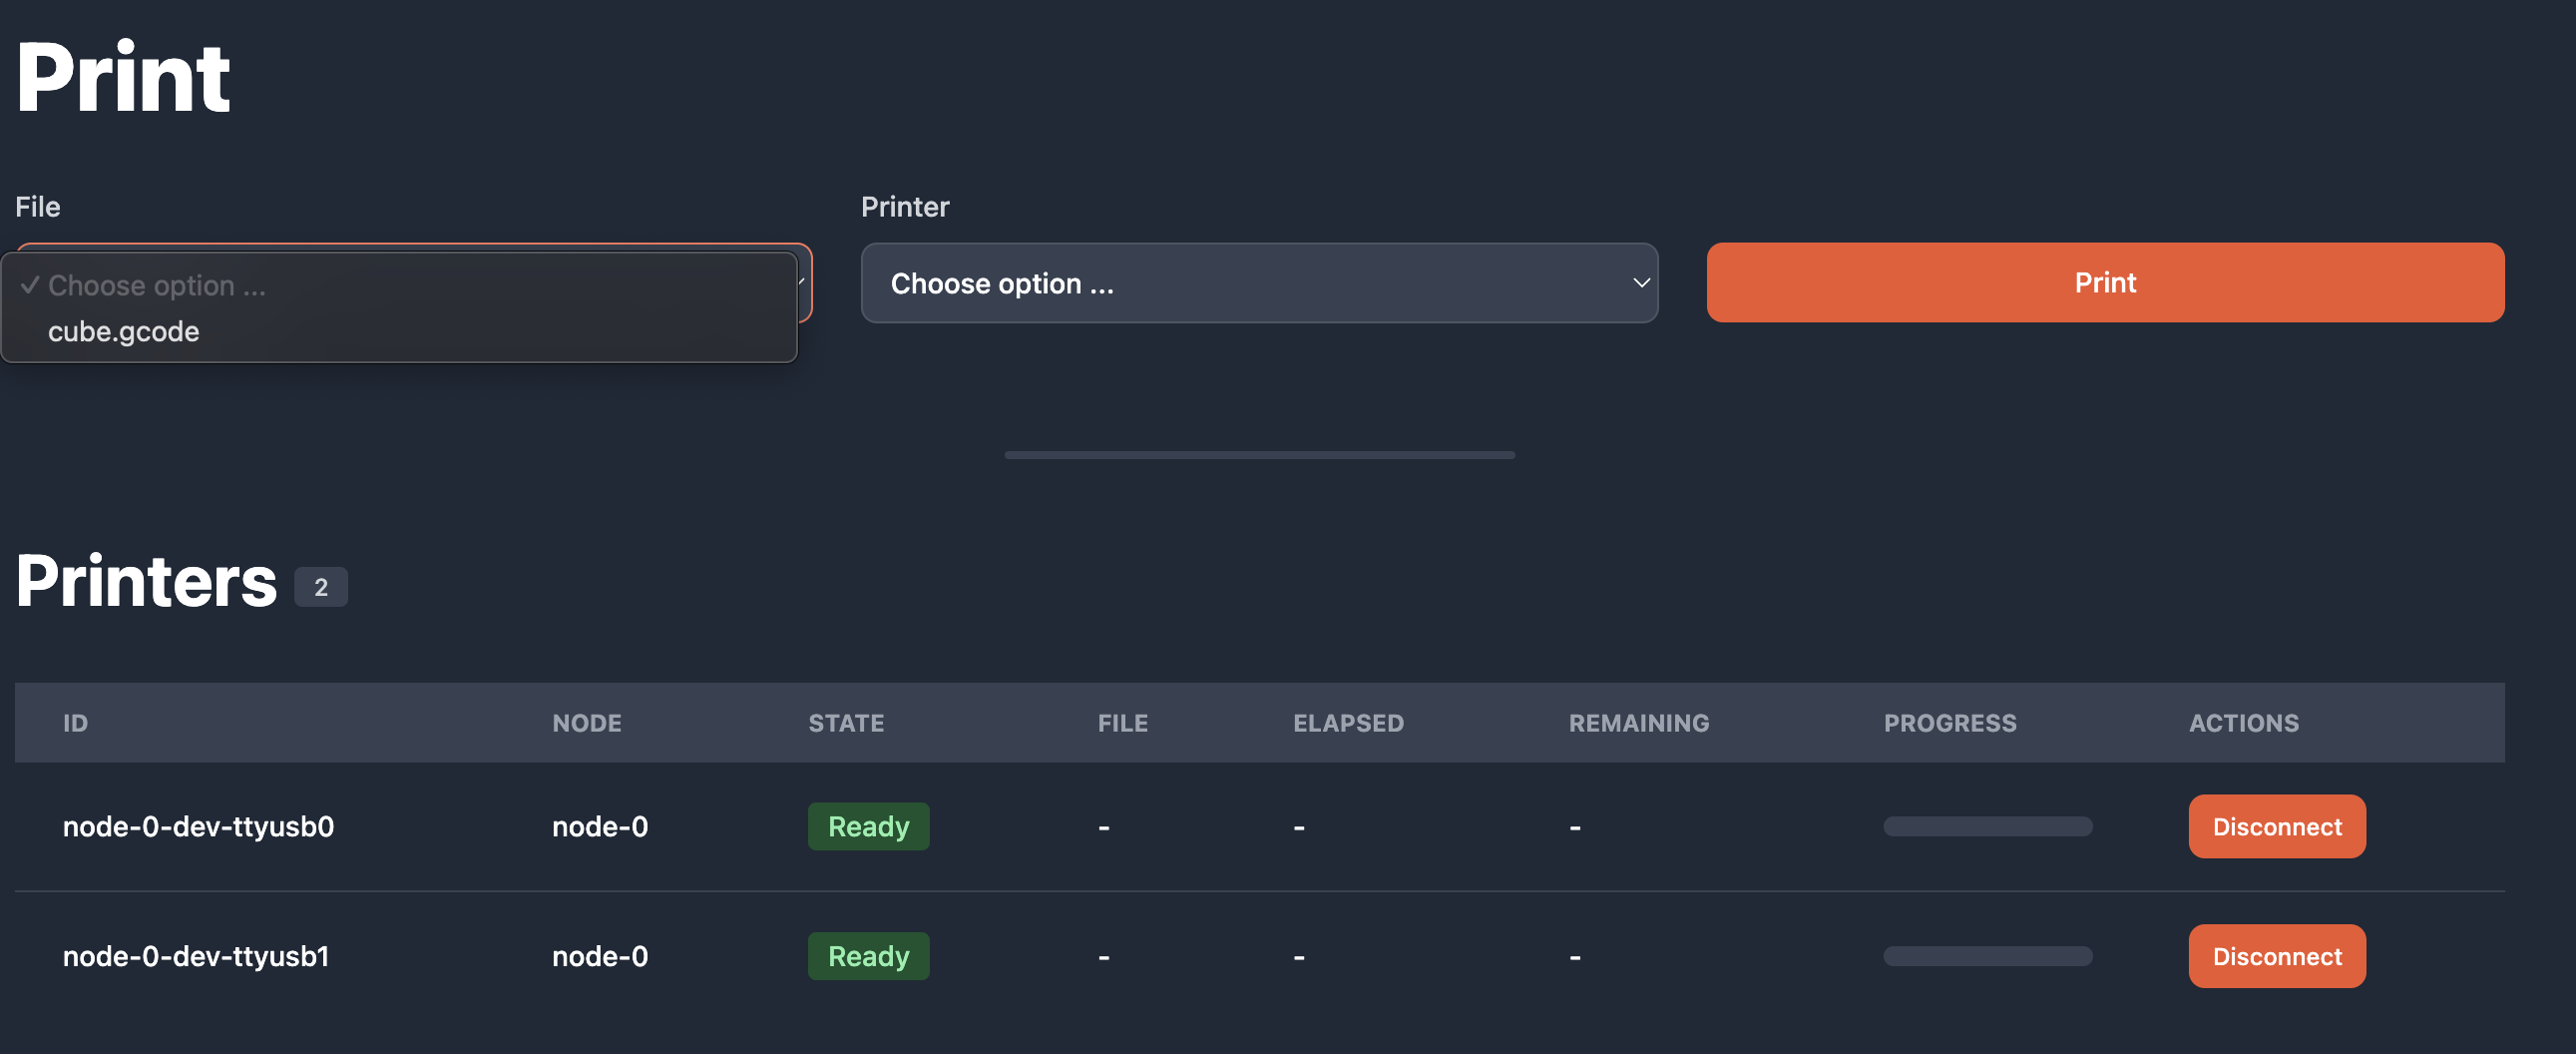
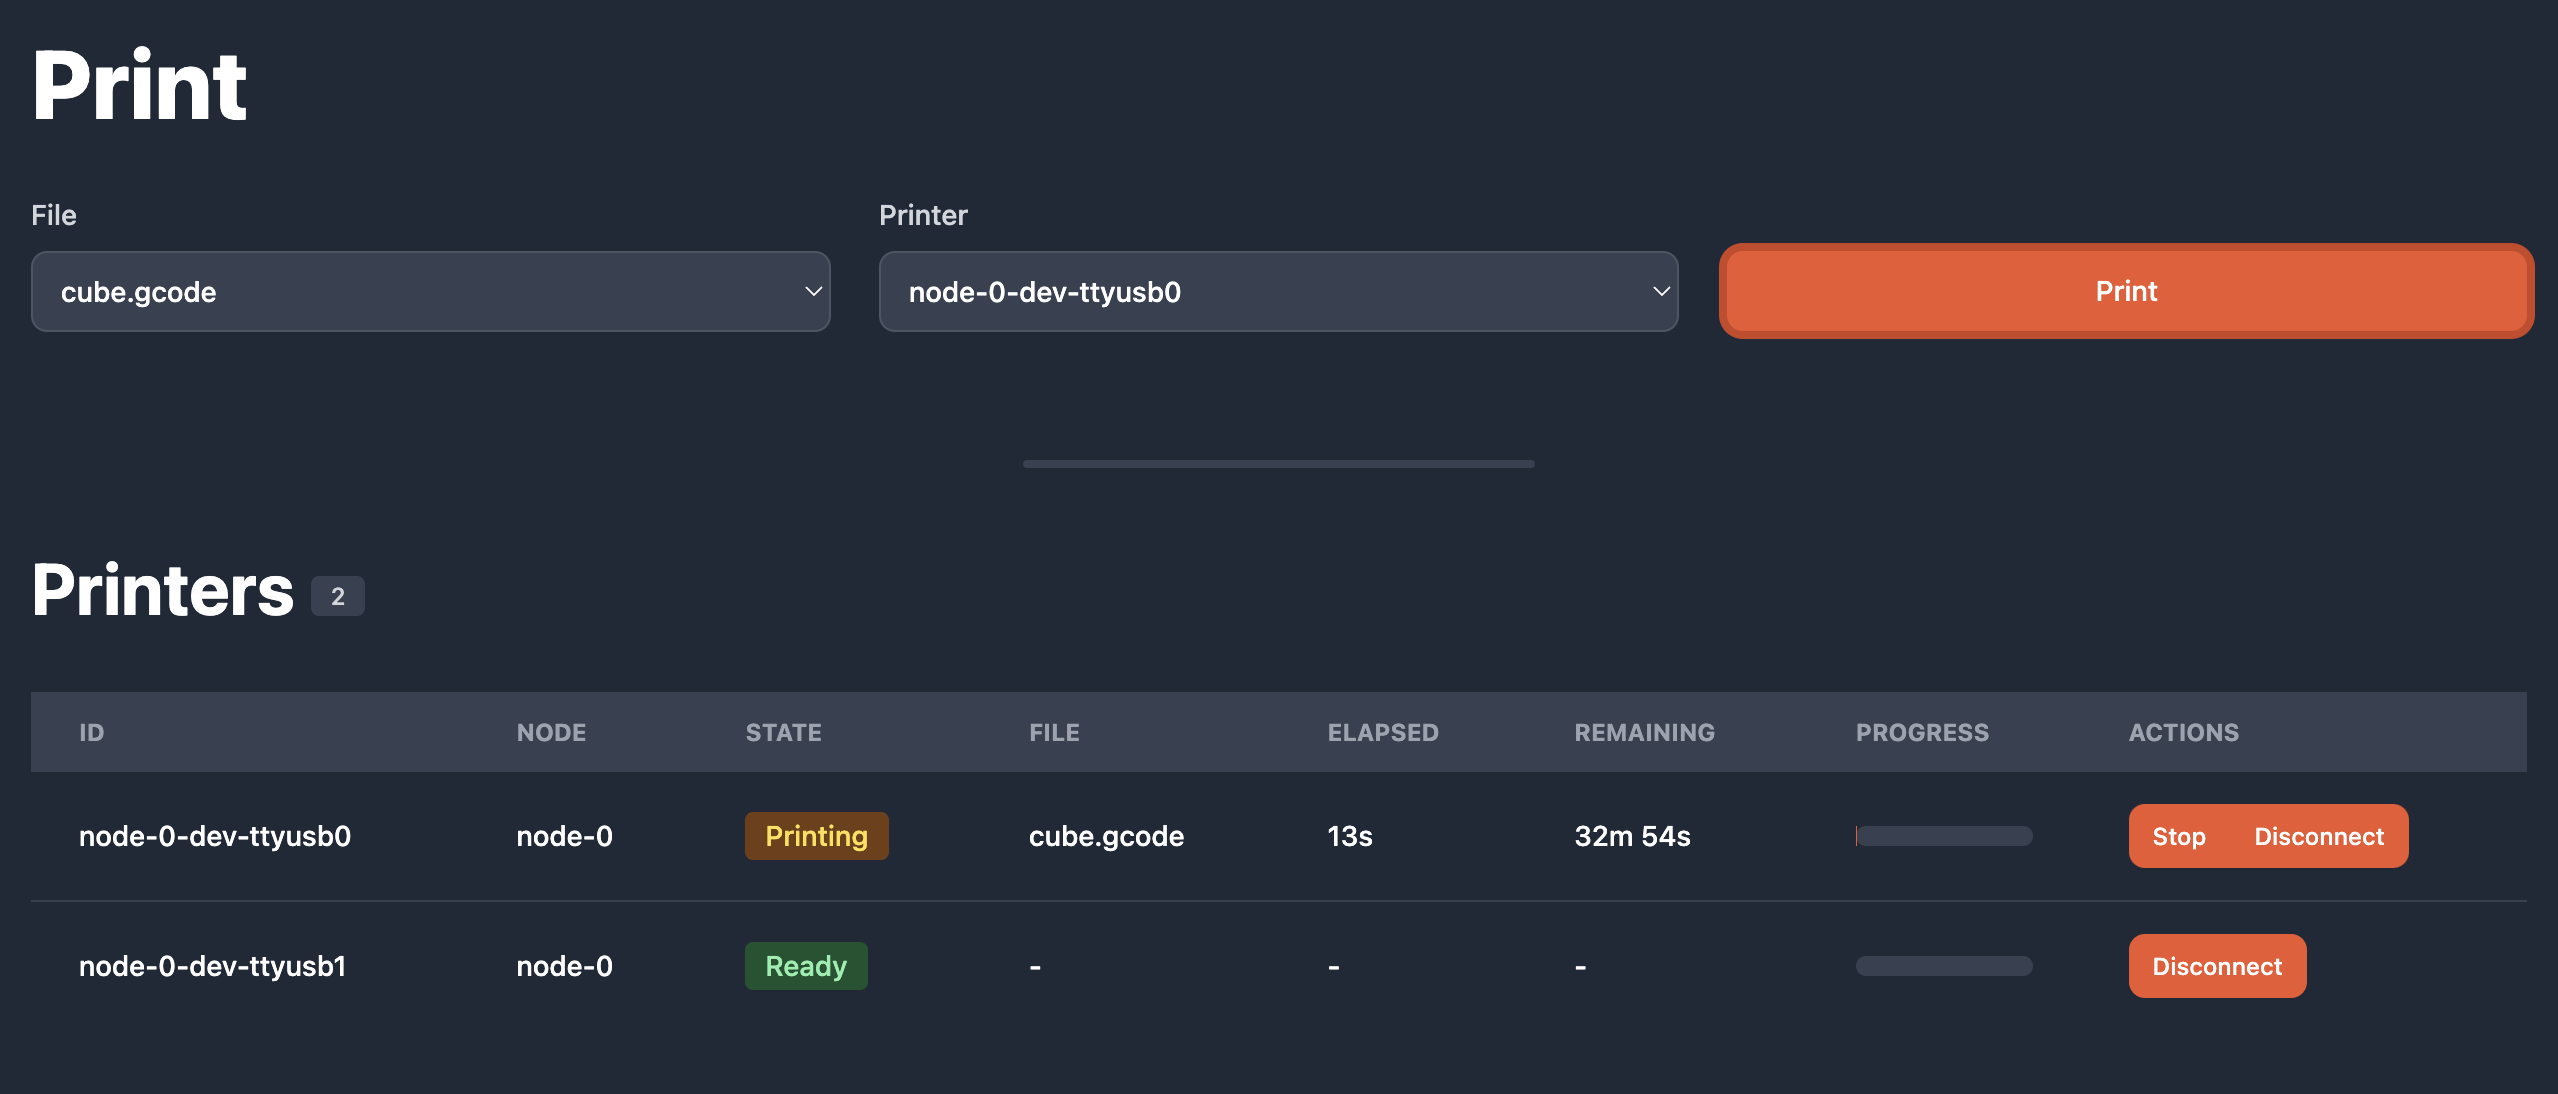
Now that a file has been uploaded, it can be sent to a 3D Printer. From the Print section at the top of the page, choose the file you want to print:
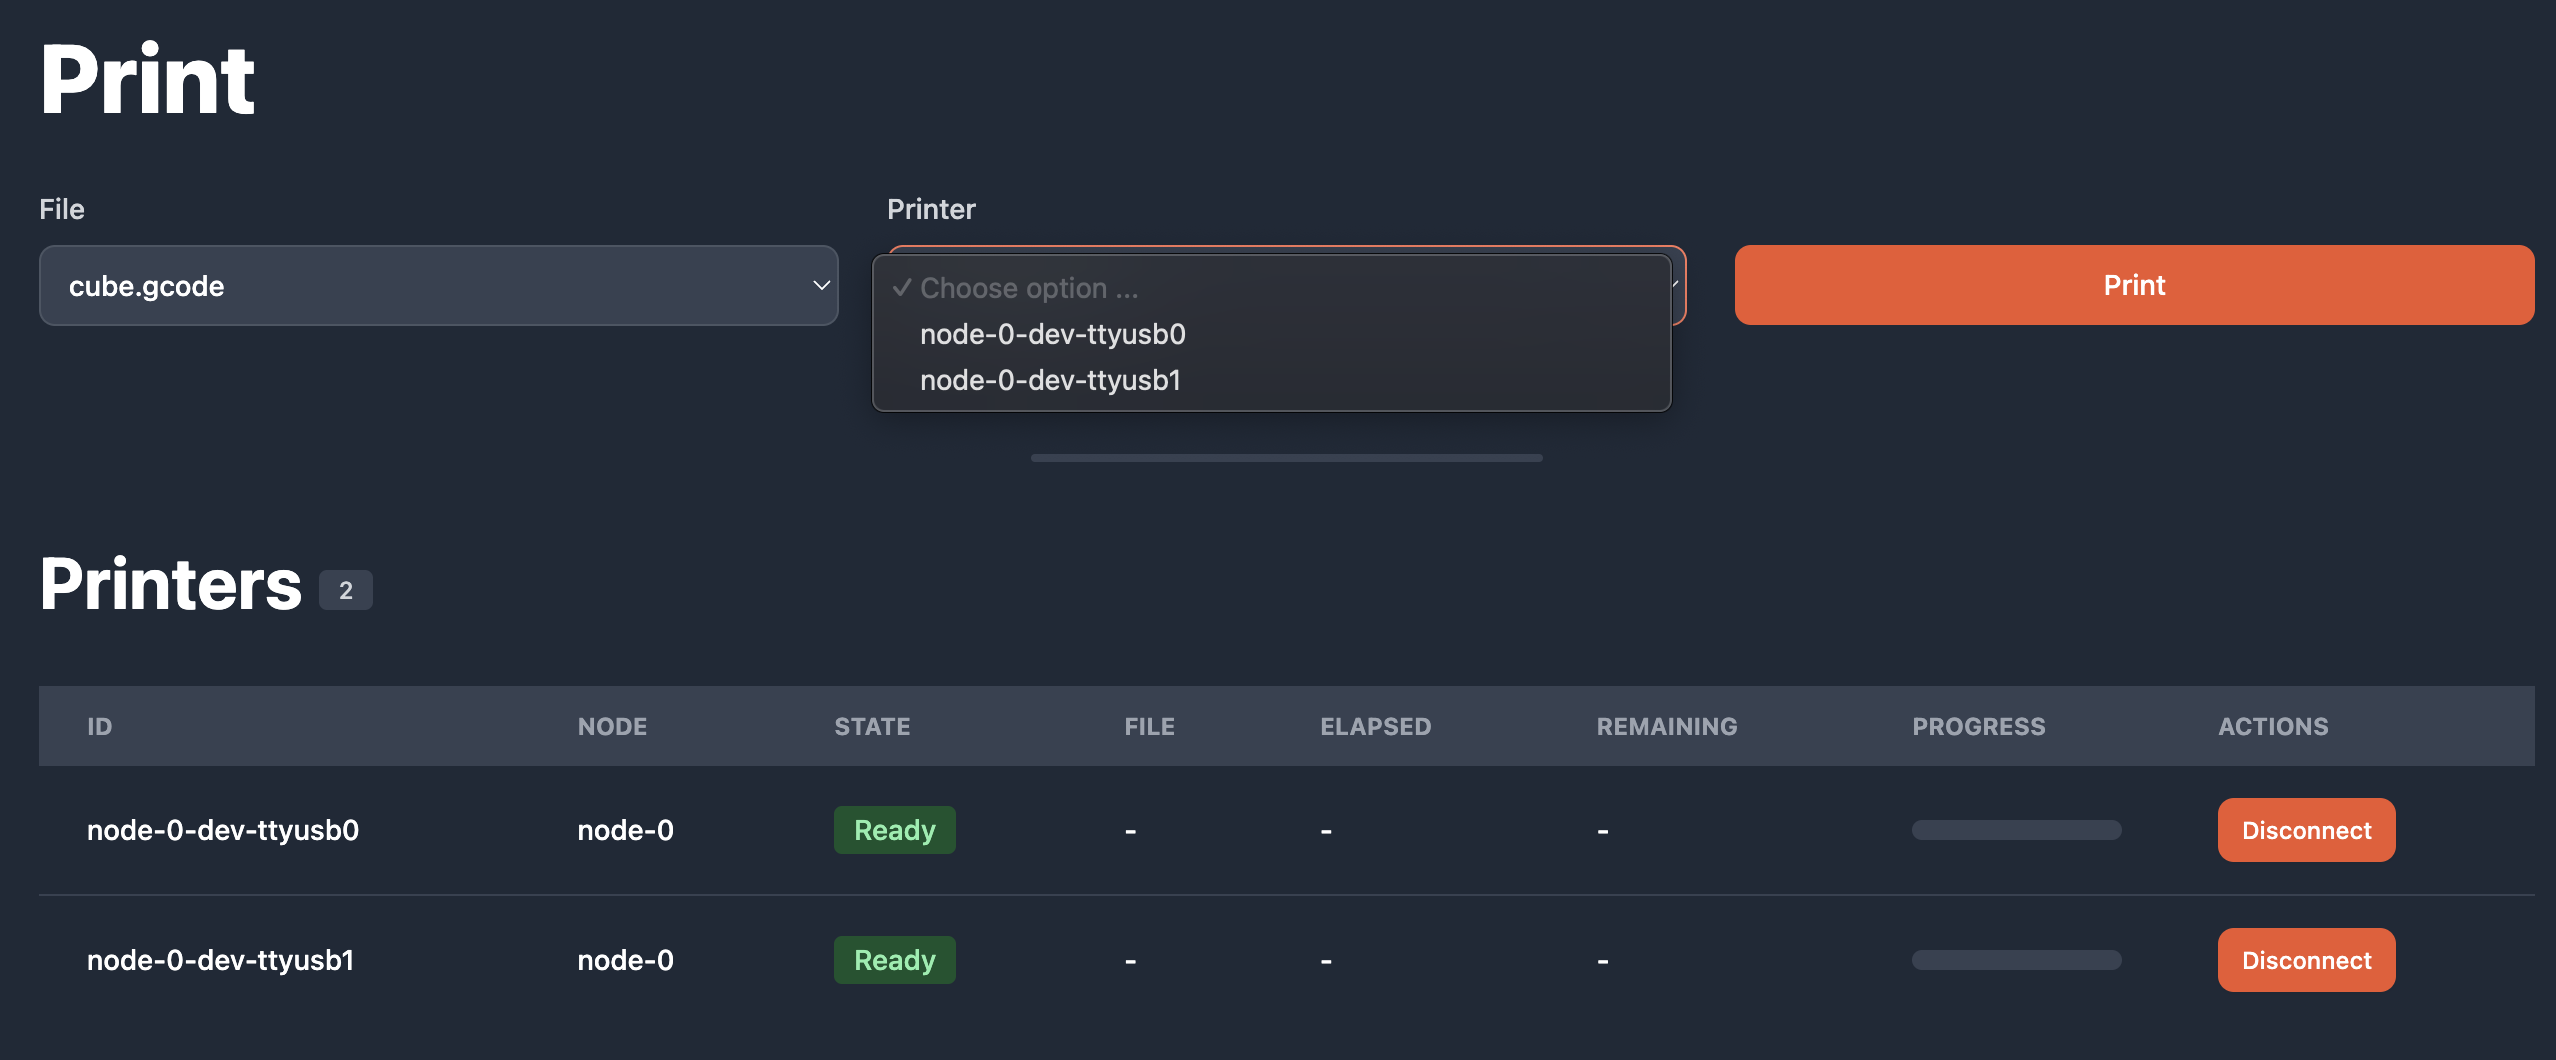
Next choose the printer to print on. 3DFarm Lite allows you to print by selecting a printer or by specifying printer tags. See more on this in Naming and Tagging Printers
Then hit print, sit back and enjoy!
Naming and Tagging Printers
Naming
Printer IDs can vary depending on the order that they're plugged in. To solve this problem a deterministic name can be set by writing a file to a microSD card and plugging that card into the 3D Printer.
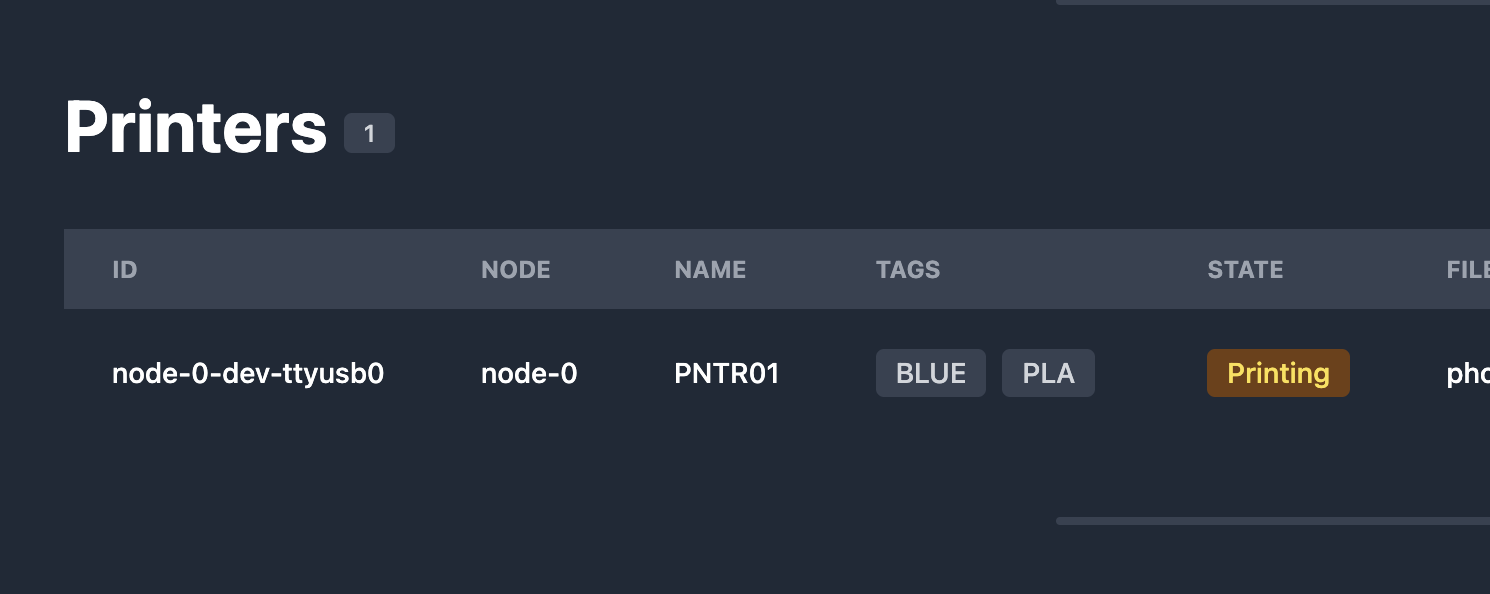
To set the name PNTR01 for example, write an empty file to the SD card with the following name and extension:
N_PNTR01.GCO
N_ tells 3DFarm that the file represents a name and the .GCO extension allows that file to be read by 3DFarm. The name of the printer (the part inbetween N_ and .GCO) can be a maximum of 6 characters. This is due to limitations in the printers firmware.
Tagging
In order to group printers, they can be given one or more tags. In the example above the printer has the tags BLUE and PLA. Print jobs can be sent to printers depending on their tags. In the example above, if I had 10 3D Printers, 5 with blue PLA filament and 5 with red, I can choose to only print on the printers with blue filament.
To tag a printer, write an empty file to the SD card with the following name and extension:
T_BLUE.GCO
To add another tag, write another file:
T_PLA.GCO
T_ tells 3DFarm that the file represents a tag and the .GCO extension allows that file to be read by 3DFarm. The printer tag (the part inbetween T_ and .GCO) can be a maximum of 6 characters. This is due to limitations in the printers firmware.
You can add as many tags as you want. A printer like the one shown above would have the following files:
N_PNTR01.GCO
T_BLUE.GCO
T_PLA.GCO
Why do Printer IDs vary?
Printer IDs are derived from the node name and the USB device path that the OS running 3DFarm is presented with. On linux, when a serial device such as a 3D Printer is plugged in, it is presented as for example /dev/ttyUSB0. On windows this might be something like COM5. The device path can change depending on the order that the printers are plugged in. The printer above's node name is node-0 and the device path is /dev/ttyUSB0 and therefore the printer ID is node-0-dev-ttyusb0.
How many printers can I connect?
The numbers of printers you can use is based on your plan. See Pricing for more information. This section is more concerned with how many printers can be physically connected to the nodes.
Practical limits
The short answer
The short answer is that you can reliably connect around 10-15 printers per node.
The long answer
The long answer is that even though on most modern computers, the theoretical limit for the number of devices you can connect per USB host controller is 127, the practical limits are usually lower due to several factors.
The node you're connecting your printers too will likely not have that many ports and so a USB hub will likely be required. Each USB port can only supply a limited amount of power. For that reason it's recommended to use one that has it's own power supply. Using the Raspberry Pi for example you may be able to connect a 7 port USB hub to each of the 4 built-in USB ports totalling 28 printers per node. However depending on your workload you may want to reduce this to the recommended amount mentioned above.
All devices on the same controller share bandwidth, which can limit performance when too many printers are connected. We recommend that you experiment with this yourself so that you're not under-untilising hardware that more printers can be connected to and so you're not over-utilising it meaning that prints are affected as the time it takes to stream G-Code over serial is increased.
Installing on other platforms
Linux
3DFarm can be installed on any Debian-based arm64 Linux distribution. The setup instructions from Installing 3DFarm can be applied here.
Packages for other Linux distributions and other architectures (including x86 and x86_64) will be available soon.
Networking
For most users it won't be necessary to read this section. The information provided here is for network admisitrators at larger businesses or educational establishments that are behind a firewall that restricts certain outbound traffic.
Firewall rules
The software that runs on the machines that connect to the 3D Printers and to 3DFarm establishes a connection to nats.3dfarm.io over TCP port 4222. Ensure that outbound traffic is allowed on this domain and this port for these machines. No inbound rules are needed as the software running establishes the connection from within your network.
The web interface located at https://3dfarm.io makes outbound HTTPS requests to 3dfarm.io using TCP port 443. These are standard HTTPS requests. The web interface also connected to nats.3dfarm.io using TCP port 8443. These are secure websocket requests.