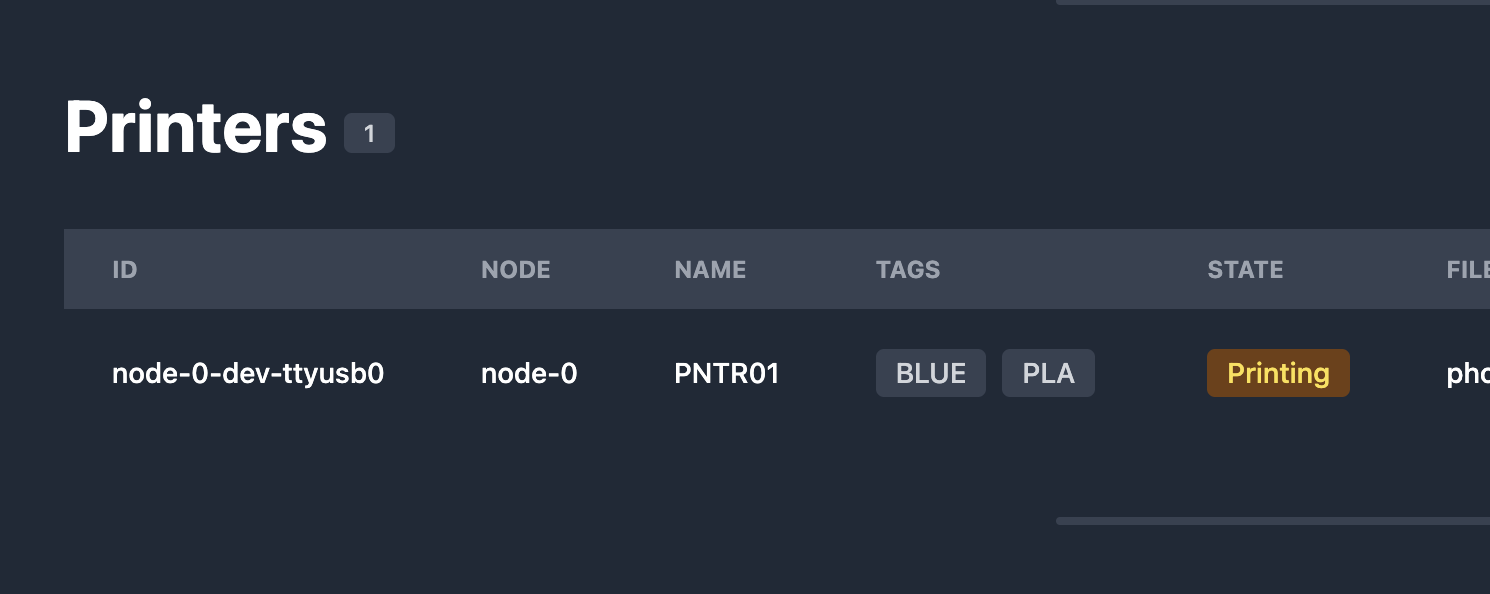
Naming and Tagging Printers
Naming
Printer IDs can vary depending on the order that they're plugged in. To solve this problem a deterministic name can be set by writing a file to a microSD card and plugging that card into the 3D Printer.

To set the name PNTR01 for example, write an empty file to the SD card with the following name and extension:
N_PNTR01.GCO
N_ tells 3DFarm that the file represents a name and the .GCO extension allows that file to be read by 3DFarm. The name of the printer (the part inbetween N_ and .GCO) can be a maximum of 6 characters. This is due to limitations in the printers firmware.
Tagging
In order to group printers, they can be given one or more tags. In the example above the printer has the tags BLUE and PLA. Print jobs can be sent to printers depending on their tags. In the example above, if I had 10 3D Printers, 5 with blue PLA filament and 5 with red, I can choose to only print on the printers with blue filament.
To tag a printer, write an empty file to the SD card with the following name and extension:
T_BLUE.GCO
To add another tag, write another file:
T_PLA.GCO
T_ tells 3DFarm that the file represents a tag and the .GCO extension allows that file to be read by 3DFarm. The printer tag (the part inbetween T_ and .GCO) can be a maximum of 6 characters. This is due to limitations in the printers firmware.
You can add as many tags as you want. A printer like the one shown above would have the following files:
N_PNTR01.GCO
T_BLUE.GCO
T_PLA.GCO
Why do Printer IDs vary?
Printer IDs are derived from the node name and the USB device path that the OS running 3DFarm is presented with. On linux, when a serial device such as a 3D Printer is plugged in, it is presented as for example /dev/ttyUSB0. On windows this might be something like COM5. The device path can change depending on the order that the printers are plugged in. The printer above's node name is node-0 and the device path is /dev/ttyUSB0 and therefore the printer ID is node-0-dev-ttyusb0.